Calibration Checks on the EnSURE Touch

Introduction

The EnSURE TouchTM allows users to verify the calibration of their instrument through the Calibration app using the CalCheck or calibration control kit.  There are three tests in the calibration verification process, Internal LED Test, Negative Test and Positive Test.  This article will provide instructions for performing a calibration check on the EnSURE Touch.

Calibration

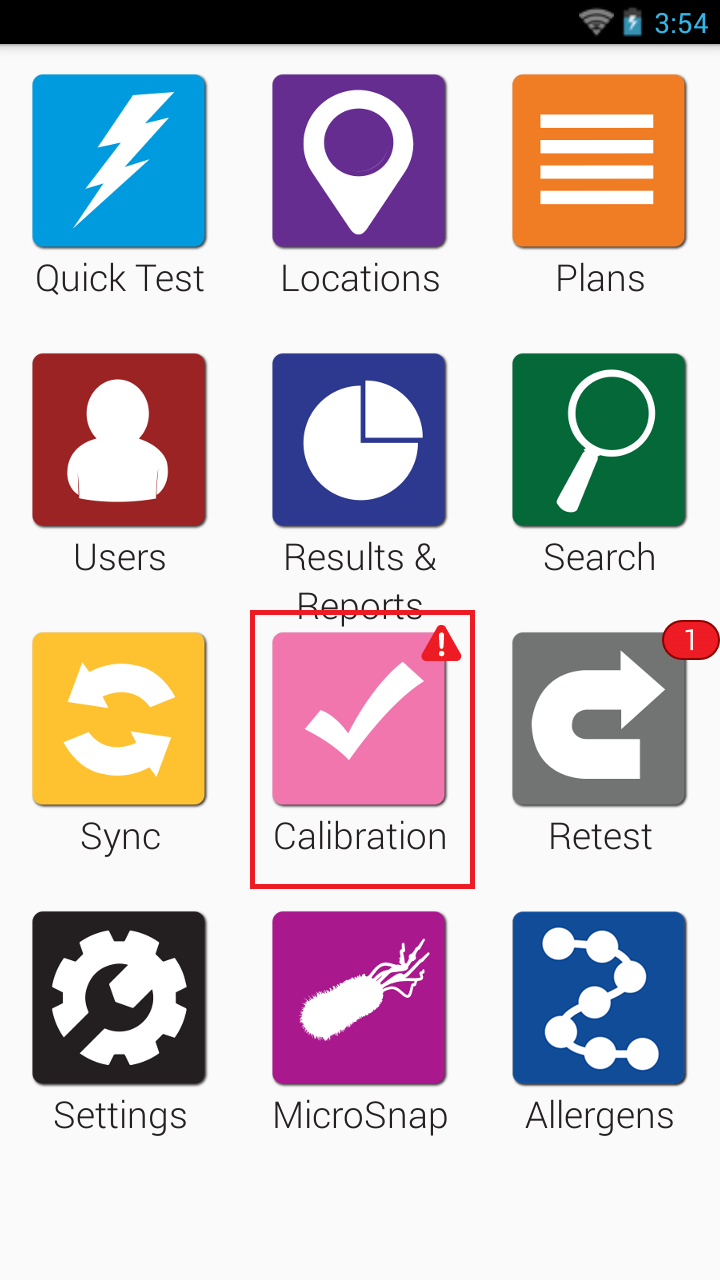
  1. From the Home Screen, select the Calibration app.
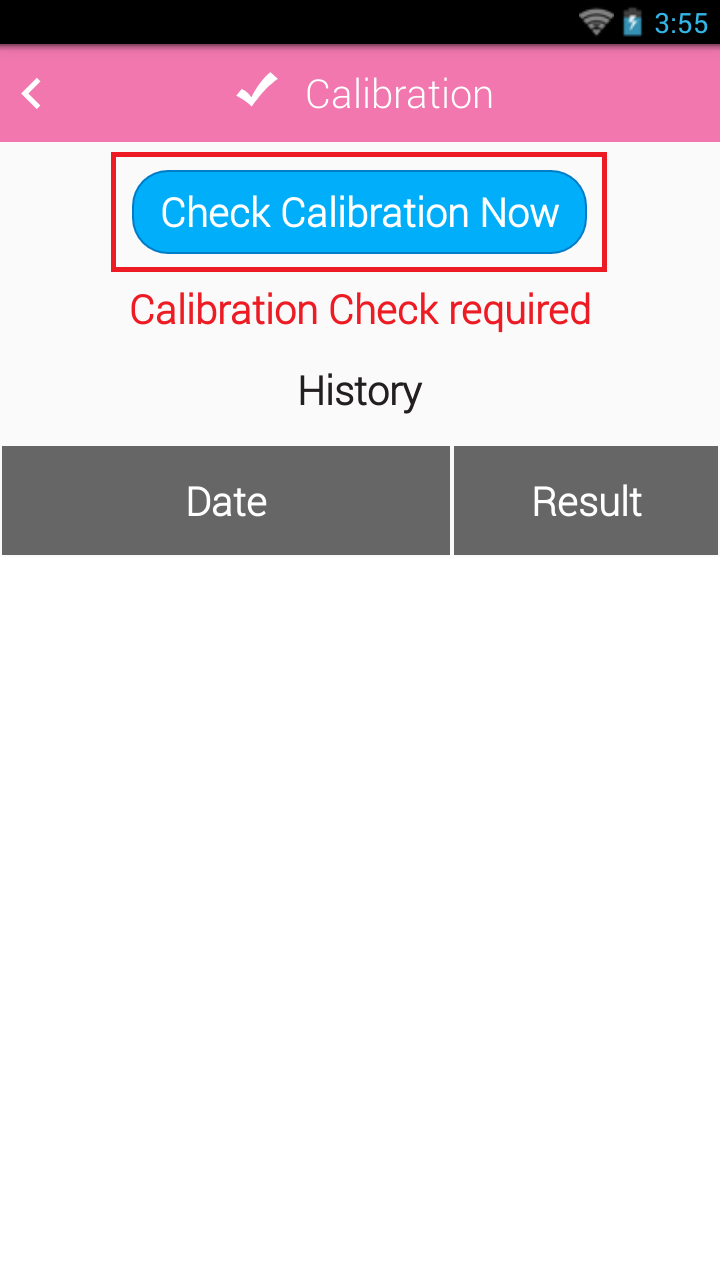
  2. Tap Check Calibration Now.
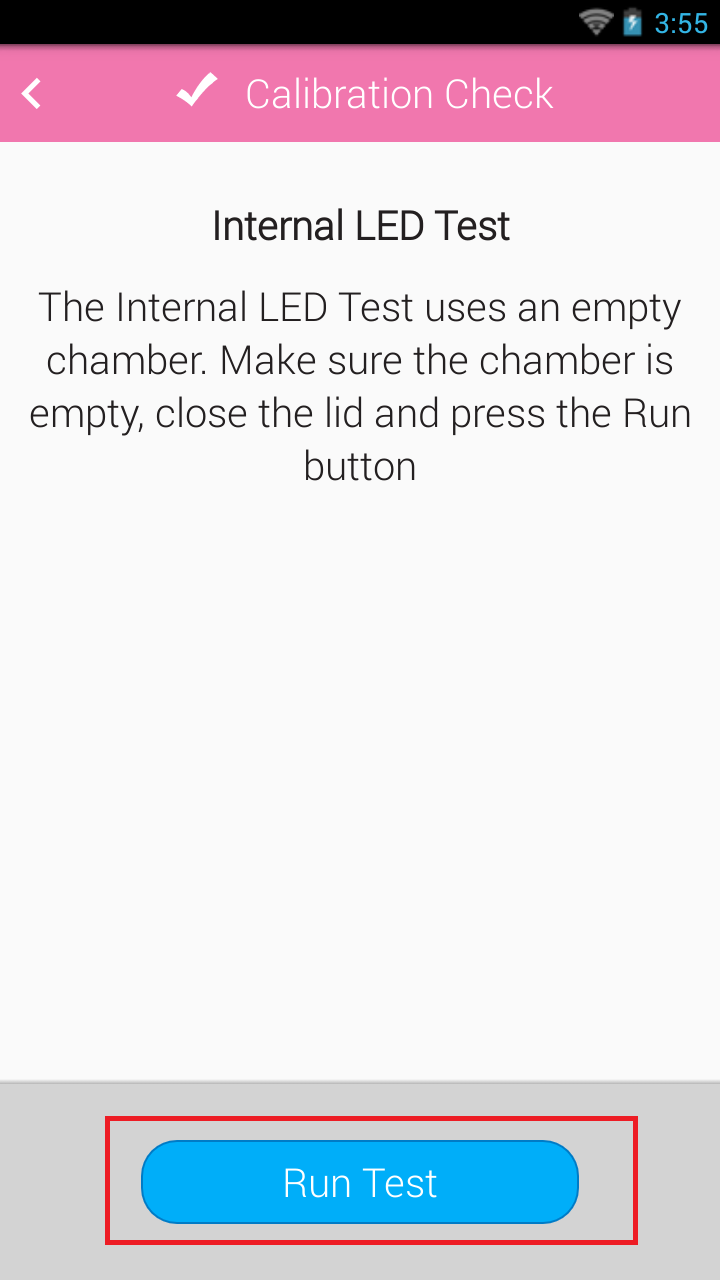
  3. Confirm the chamber is empty and tap Run Test to start the Internal LED Test.
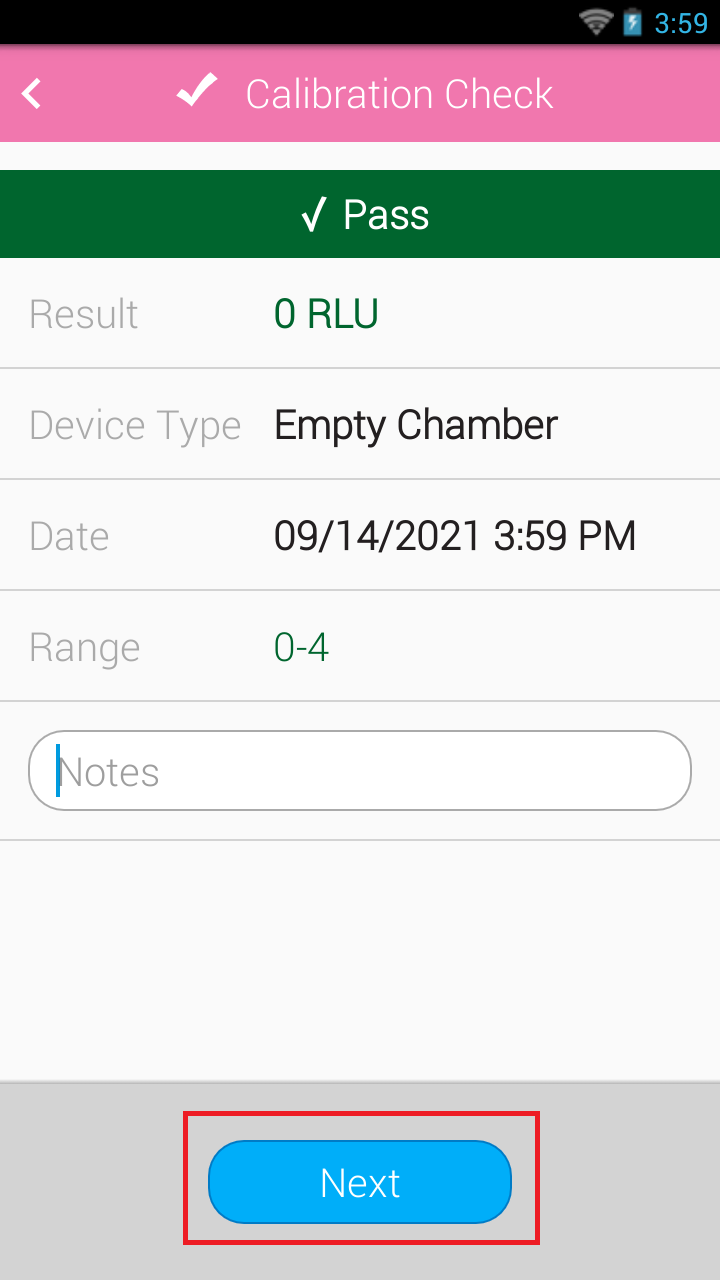
    RLU values greater than 500 are passing.
  4. Tap Next.
  5. Confirm the chamber is empty and tap Run Test to start the Negative Test.
    RLU values between 0-4 are passing.
  6. Tap Next.
  7. Tap the positive control you are using.
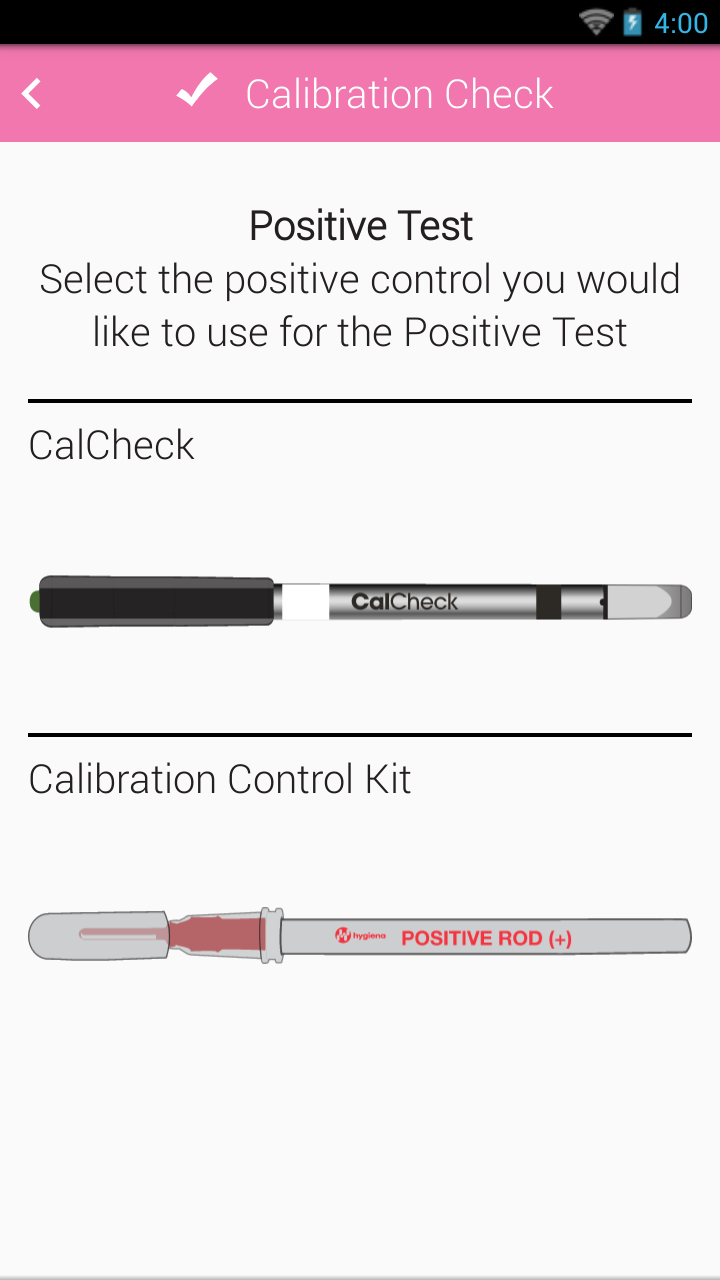
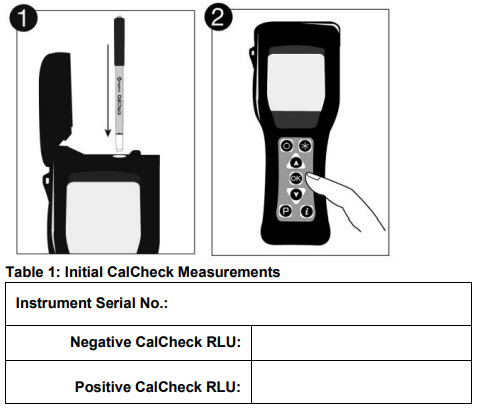
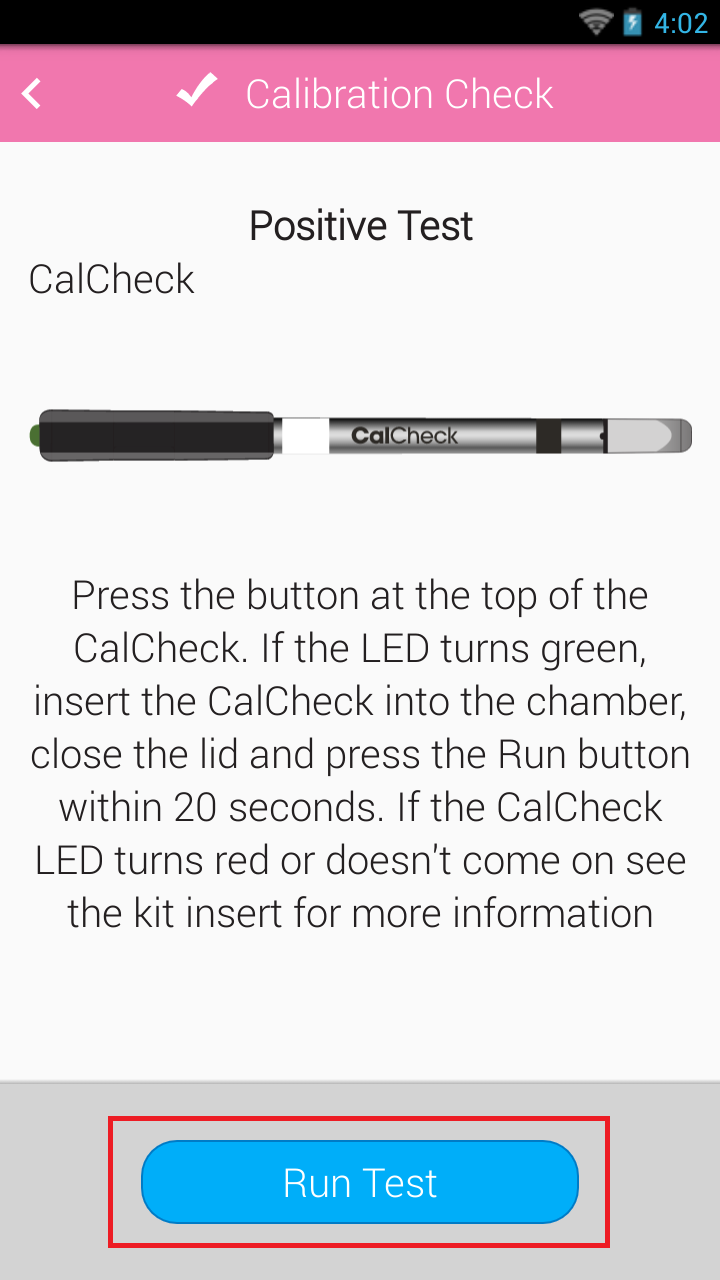
  8. For CalCheck: Press the button at the top of the CalCheck. If the LED turns green, insert the CalCheck into the chamber, close the lid and press Run Test within 20 seconds.  If the CalCheck LED turns red or doesn’t come on see the kit insert for more information.
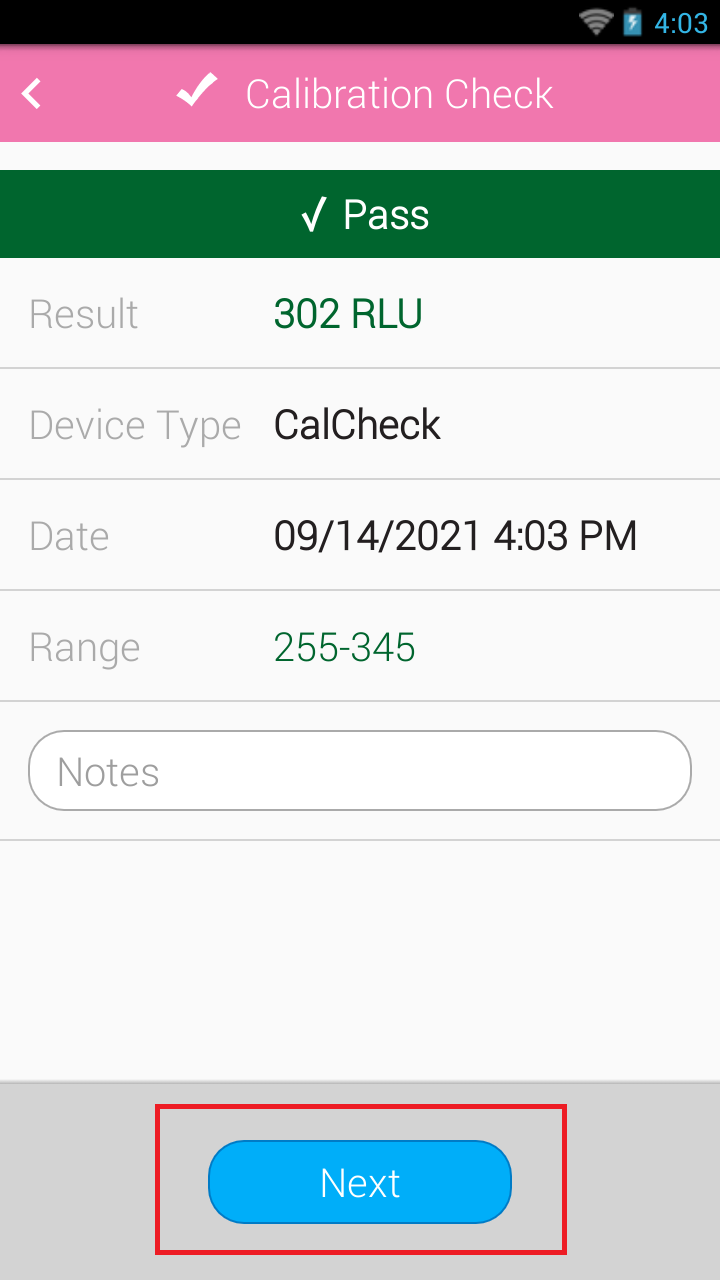
    CalCheck results between 255-345 RLU are passing.
    For Calibration Control Kit:  Insert the Positive Control rod and tap Run Test.
    Calibration Control Kit results between 130-230 are passing.
  9. Tap Next to complete the test. If any of the test failed, please contact Hygiena Technical Support for assistance.


Viewing Calibration History

On the EnSURE Touch:

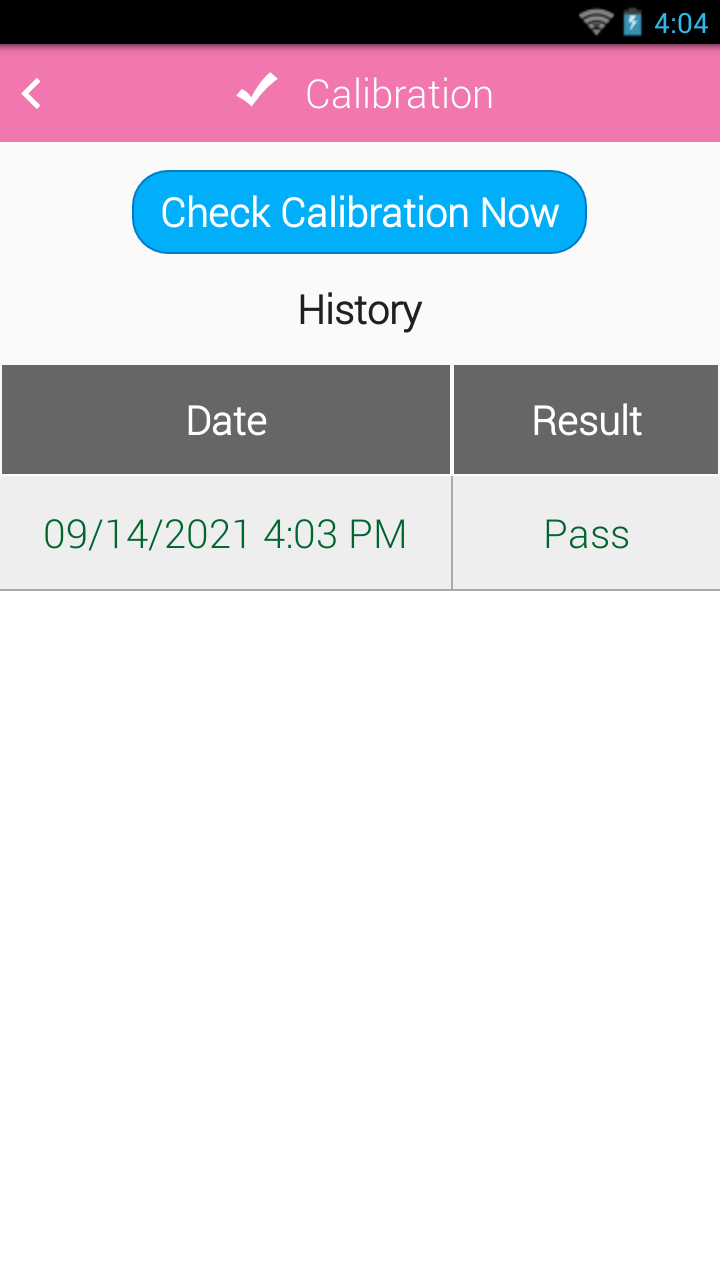
  1. From the Home Screen, tap the Calibration app.
  2. The table shows a history of calibration checks.
  3. Tap a row on the table to view the results for each test.

In SureTrend Cloud:

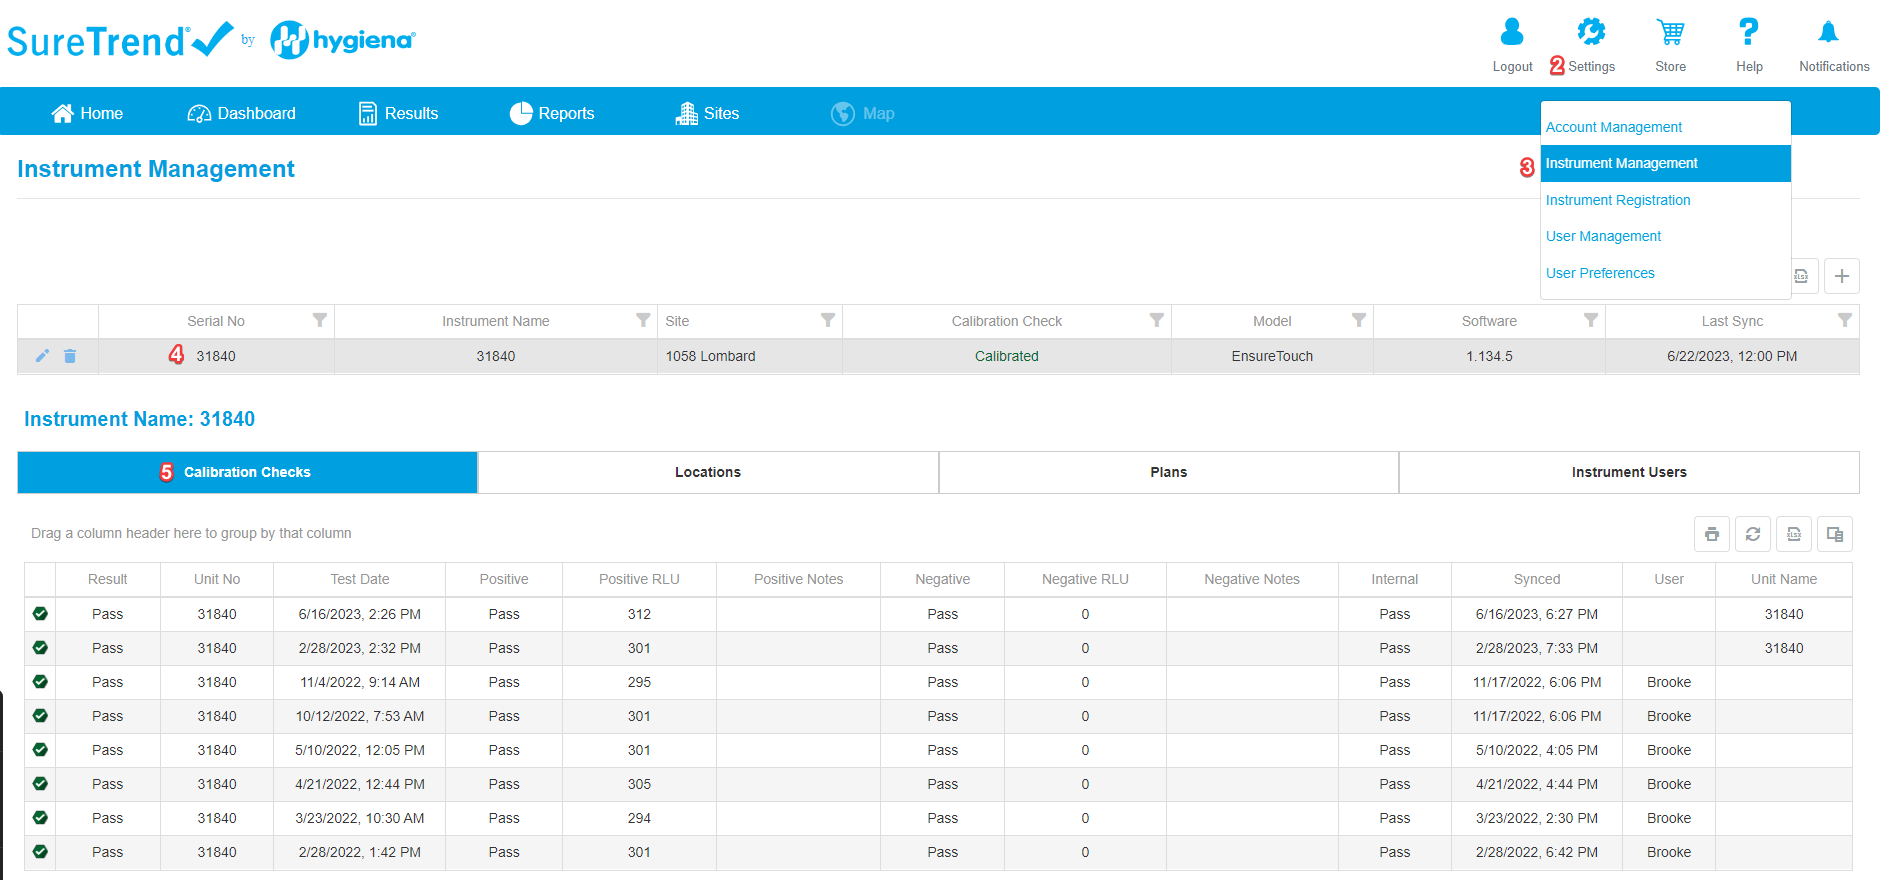
  1. Log into your Sure Trend Cloud account here.
  2. Click the Settings option in the top right.
  3. Go down to Instrument Management.
  4. Click on the serial number of the instrument you wish to see calibration history for.
  5. Be sure Calibration Checks is selected from the options below to see detailed history.

If you are having trouble with Calibration checks on your EnSURE Touch, please contact Hygiena Technical Support for assistance.


CalCheck Verification with EnSURE and SystemSURE Plus

Description / Inteded Use

CalCheck is a reusable device used to verify Hygiena Luminometer calibration is within the manufacturer’s specifications. When powered on by pressing the button on CalCheck  cap, the device emits a low level of constant LED light output for 60 seconds. In the off State, CalCheck can be used as a negative control device.  Hygiena recommends verification of luminometer calibration with CalCheck at a regular interval (e.g., weekly, monthly) as specified by user-defined quality procedures. Incorporating CalCheck into a quality control program verifies the luminometer is within specifications and operating correctly.

Instructions:

Upon first use, CalCheck positive and negative measurements must be recorded in Table 1 to serve as a reference for future calibration checks.

Negative Check:

  1. Taking care not to press the button on the cap, insert CalCheck into luminometer and close lid.
  2. Press “OK” to initiate the measurement.
  3. Record the initial negative CalCheck RLU in Table 1 below. For ongoing testing refer to the interpretation of Results.

Positive Check:

  1. Insert CalCheck into a luminometer. Press Button on CalCheck cap to turn the device on. The button will glow green to confirm the activity. (If button glows red or remains dark, the battery should be replaced (Please see “How to change Battery” in Hygiena Help)
  2. Close lid and press “OK” to initiate the measurement.
  3. Record the initial positive CalCheck RLU in Table 1 below. For ongoing testing, refer to the Interpretation of Results.

Troubleshooting:

Higher-than-expected CalCheck RLU readings indicate system calibration failure. Contact Hygiena for Technical Support Here. Physical contamination can cause lower-than-expected CalCheck RLU readings.

  • Clean outside of rod with a lint-free cloth containing isopropyl or ethyl alcohol. Air dry and repeat reading.
  • Remove the luminometer read chamber and clean it. Refer to FAQs at https://help.hygiena.com/kb/ for cleaning instructions.
  • If the issue is not resolved, contact Hygiena for technical support.

Incorporating CalCheck into Quality Control Program:

CalCheck is designed to be incorporated into a quality control program that monitors and tracks the performance of Hygiena luminometer(s). For optimum recordkeeping, it is recommended that a specific location be programmed in SureTrend data analysis software for measuring CalCheck on the luminometer.

Storage & Shelf Life:

  • Store at 10 – 25 C (50 – 77 F) in original packaging.
  • If CalCheck is exposed to extreme temperatures (direct sunlight, heat, refrigeration, or frozen), allow device to acclimate to ambient temperature (10 – 25 C / 50 – 77 F) for 30 minutes before use.
  • Take care to not press the power button during storage as this will shorten battery life.
  • Replace CalCheck as needed. Refer to the expiration date on the label.

Caution:

Wait 2 minutes between each positive reading. Repeatedly activating CalCheck may temporarily drain the battery.


Changing The CalCheck Battery

Introduction

In this tutorial, we will walk you through how to replace your CalCheck Battery.  You may need to replace the battery if you activate the positive control often, notice the activation light turns red when pressed, or if your CalCheck rod is reading lower than the acceptable range. This tutorial will show you how to replace the CalCheck rod battery.

Steps

  1. Remove battery cover. There is a cover over the battery on the top side of the CalCheck (Figure 1) that you will need to gently ‘pop’ off. Be sure to remove with ease as this cover requires very little pressure to remove. Do not twist off this cover as it cuffs around the CalCheck rod and should avoid being stretched. Figure 2 shows the cover removed and the battery exposed. 
  2. Remove & replace battery. Gently remove the current lithium coin battery and replace it with a brand new one. The battery needed is a small coin shaped CR1025 battery (see Figure 3). It is essential to utilize a well-known name brand battery as others have proven to be too weak to provide the maximum 3V or more needed to product accurate RLU readings.

Figure 3. Examples of the CR1025 battery needed


A. Slightly pinch the internal battery terminals prior to replacing the battery to make sure there is a secure connection when inserted.

B. Be sure the battery is correctly inserted into the CalCheck, paying special attention to make sure the polarity is not reversed.  Top of coin cell is the side with a +.

C. If the battery is installed incorrectly or the contacts are loose, there will be no light when rod is activated.

  1. Reattach battery cover. Once you have the new battery in place you will have to align the cap correctly upon reattachment. There is a notch that you will see on the inside of the cap that needs to align up towards the top of the Cal Check (See Figure 4 for clarification)

Figure 4. Look on the inside of the battery cover for a tiny notch the needs to be positioned upward to the top/button end of the CalCheck rod upon reattachment.

Figure 4. Look on the inside of the battery cover for a tiny notch the needs to be positioned upward to the top/button end of the CalCheck rod upon reattachment.

  1. Test Rod. Now that the new battery is in, and the cap is aligned properly you can test the CalCheck by pressing the top button. You can determine that the battery replacement was successful when you see the green light activate (see Figure 5) during this process.

Figure 5. Green light present when rod is activated and receiving sufficient voltage.

If you need further assistance, contact Hygiena Technical Support.