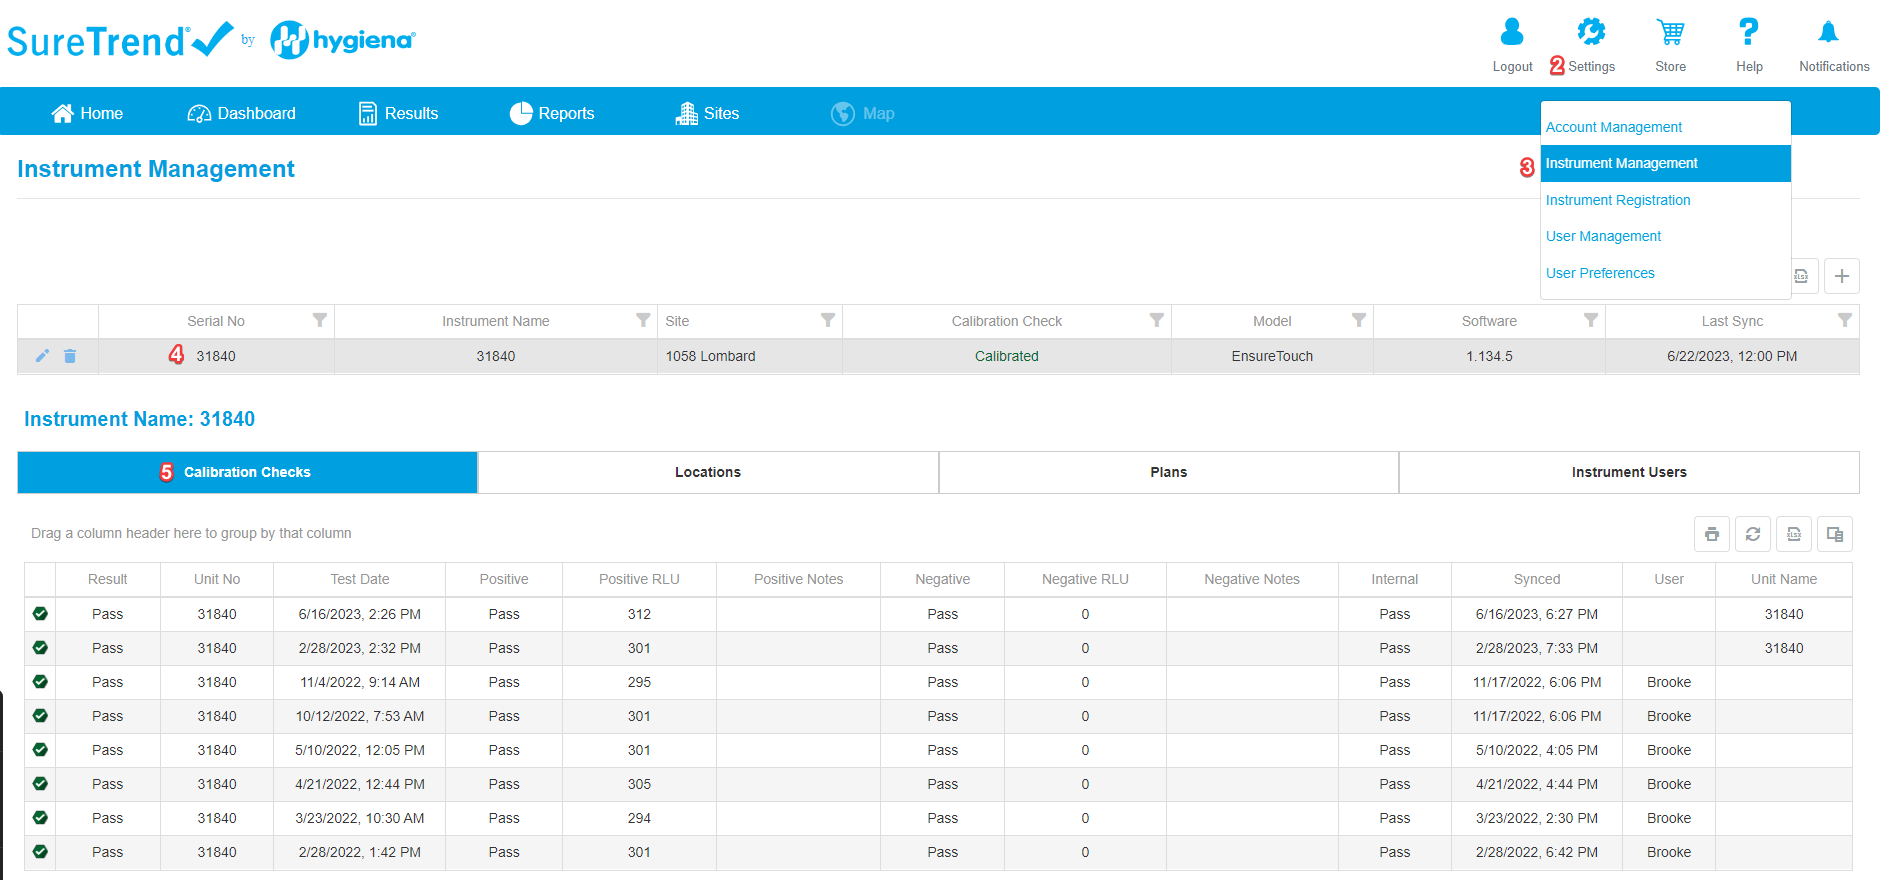
Android, like most modern operating systems, separates the display language from the input language (i.e. keyboard). For example, you can have the display is Spanish and the keyboard in Russian. On the surface this does not make sense, however, if you look closer there is a valid reason to have them separate. In most cases, the user wants to see the display language in their preferred language, but the input language needs to be consistent for the organization. Having the data in different languages, for most applications, is not feasible. For example, you could have the following Location “Doorknob “entered in different languages SureTrend Cloud. While possible, it would be difficult for users unless they are multilingual.
- Doorknob
- 门把手
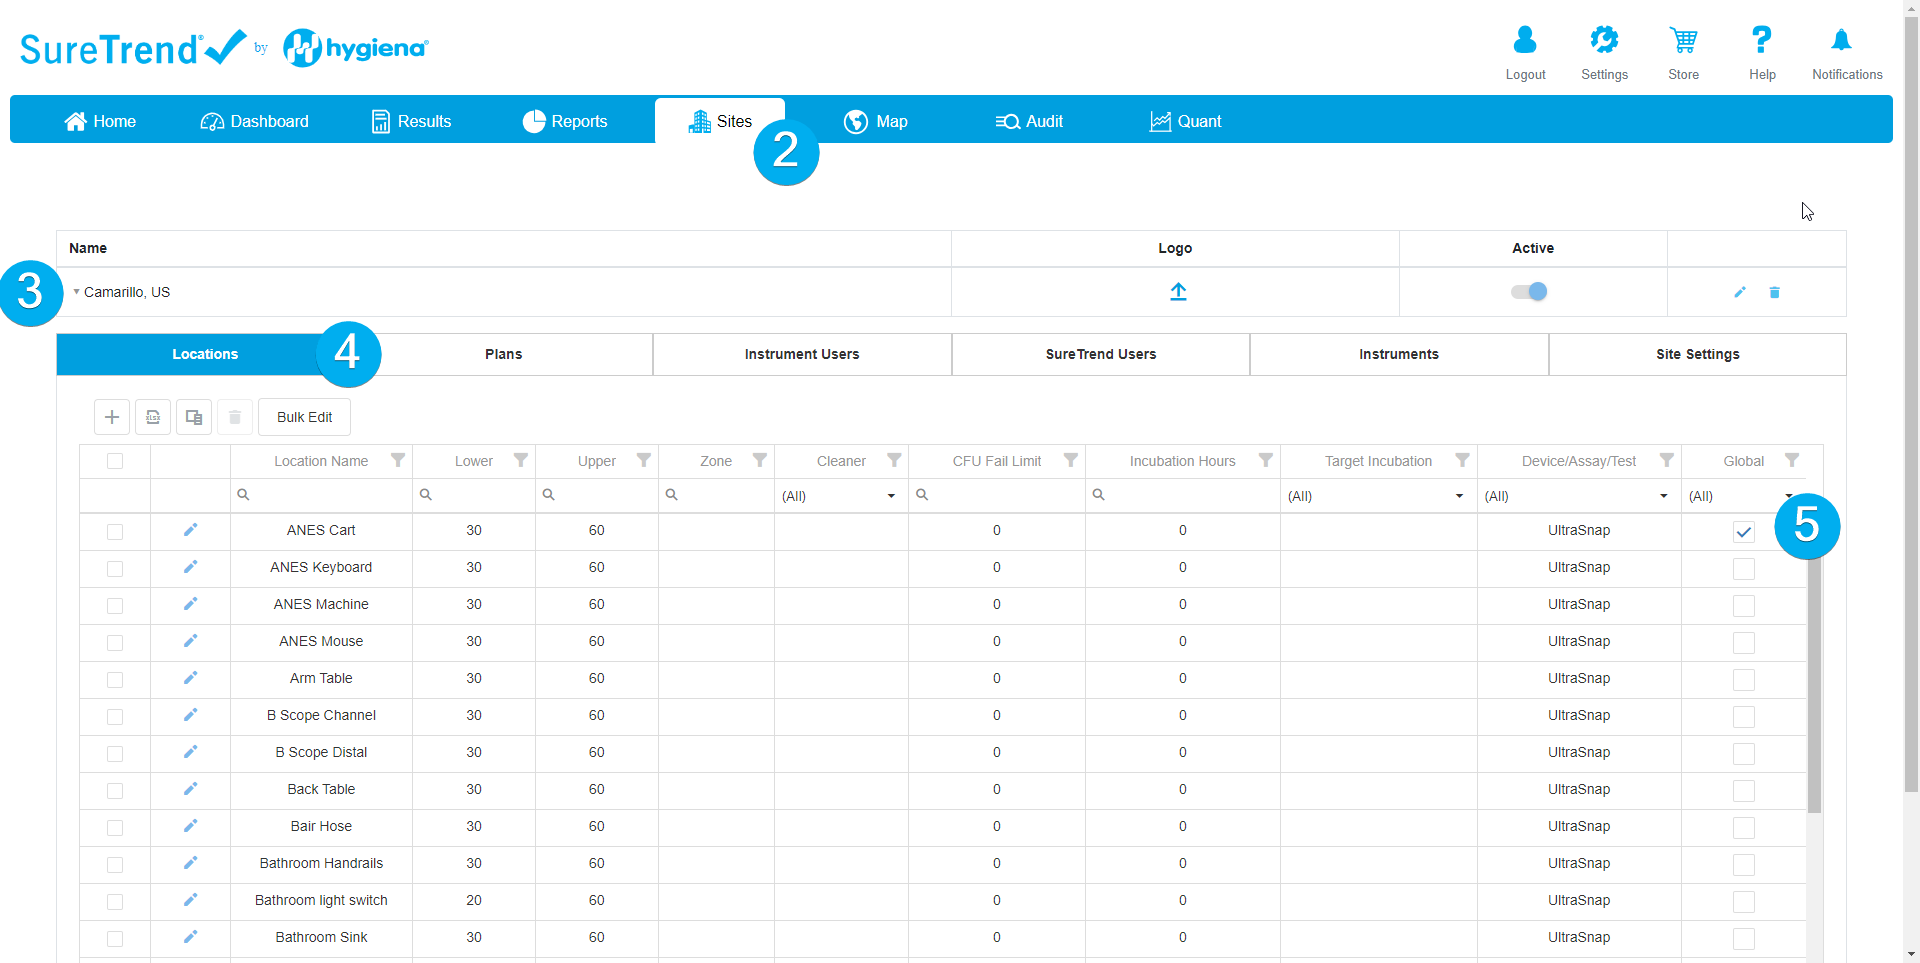
- Perilla de la Puerta
- مقابض الابواب
Android Language Settings
Android language settings are straight forward. EnSURE Touch exposes all the languages the EnSURE Touch supports directly from with the EnSURE Touch App.
The reason the EnSURE Touch only exposes a subset of Android languages is that all the nomenclature in the EnSURE Touch application must be translated before an Android language can be supported. If the user selected a language from Android that was not translated in EnSURE Touch, the EnSURE Touch would show English, but internal Android features would show the language selected.
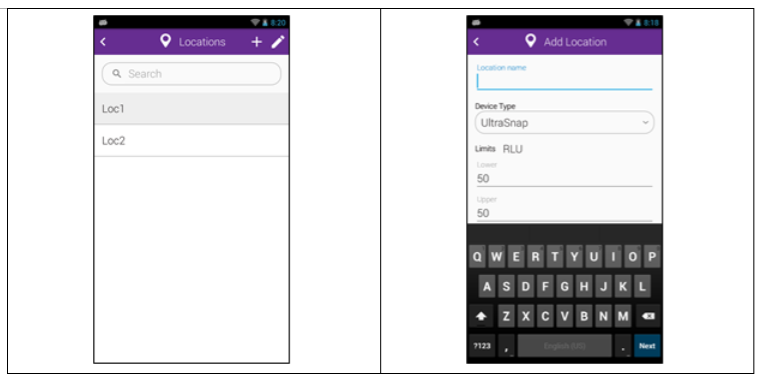
You can see in the example below if the Android language Kiswahili is selected, EnSURE Touch shows the activity Locations in English, but in the search window the Android text “Search” is translated to Kiswahili and shows “Tafuta”.
EnSURE™ Touch Keyboard
Android input methods (Keyboard) settings and much more complex than Language settings. Android makes the input methods richer to allow for more advanced input. Android allows for custom input methods that include a custom keyboard, keyboard styles, key swiping, physical keyboards, clipboards, voice commands, and more. For the purposes of this document, we will refer to the input method as the Keyboard since the EnSURE Touch does not have a microphone.
Keyboard Behavior
The keyboard will pop up when you tap an entry field or will auto popup if the EnSURE Touch application assumes you need to enter data. For example, in Locations activity, it is not clear if the user wants to search or select a location so the keyboard does not auto popup, but when you enter a new location the Location name is required and the keyboard will auto popup.
You can always dismiss the keyboard by pressing the back button at the bottom right of the EnSURE Touch and bring the keyboard back by taping the field.
Keyboard Layout
The keyboard layout will change based on the type of field you are entering. If you are entering alphanumeric data, the text keyboard will display. If you are entering numbers, the numeric keyboard will display. For dates and other data types, there is no need for the keyboard. The UI has features like date and time selector, and dropdowns or toggles.
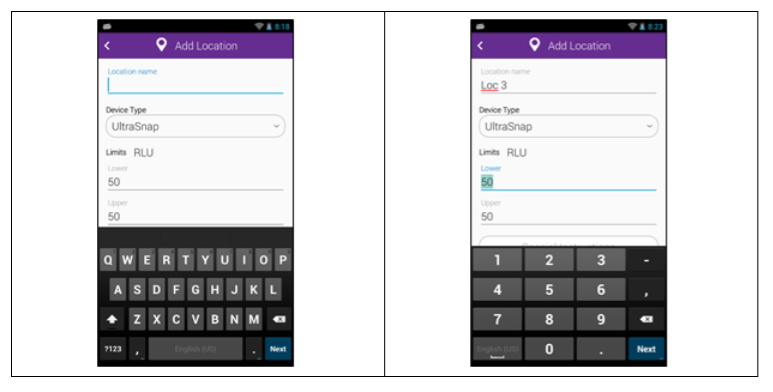
Extended Keyboard
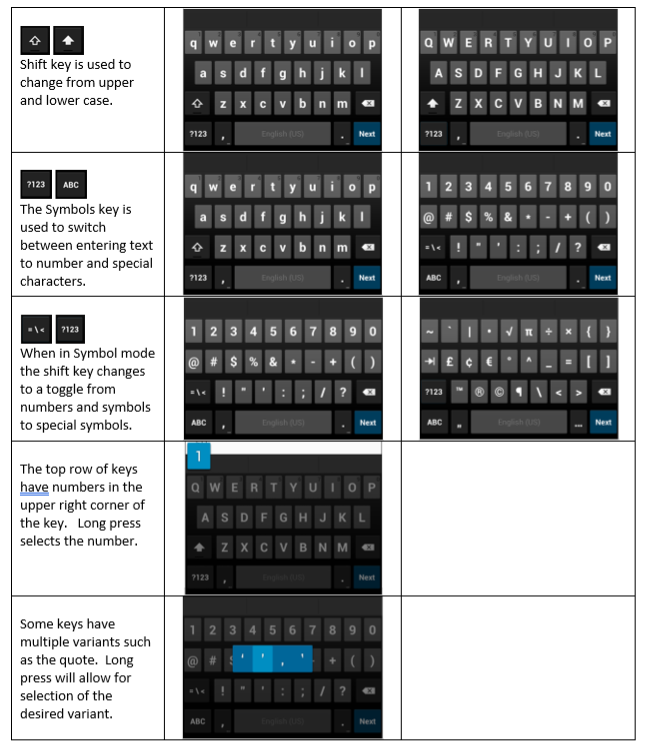
The alphanumeric keyboard shows the default characters. Keys on the keyboard are can change the layout or allow for entry of other characters.
Custom Input Methods (Keyboard)
Many custom input methods (Keyboards) are APKs installed from the Google Play store. Since EnSURE Touch is a locked system it does not allow users to install the software.
Input Method (Keyboard) Selection
To simplify the input method (Keyboard) selection, EnSURE Touch matches the Keyboard with the language selection. This is an attempt to make the EnSURE Touch setup easier for the user because the Keyboard options in Android are many and can be confusing because the EnSURE Touch does not support many of them.
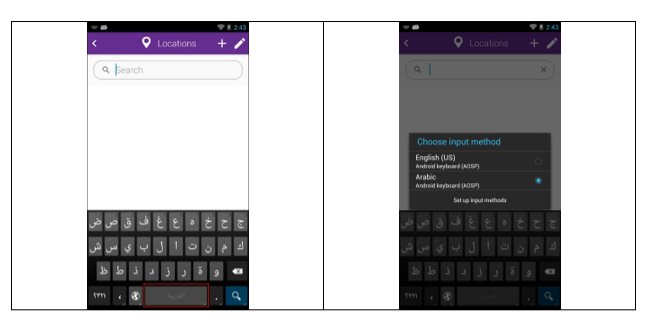
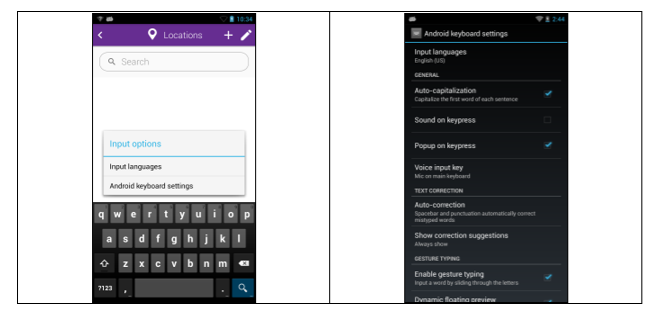
Access Input Options
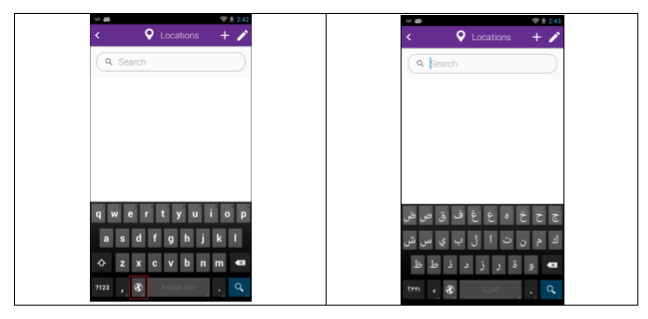
Android makes it possible to access keyboard options from within the keyboards. To access the keyboard options, press and hold the “,” key for 2 seconds and then let go. The Input options menu will appear.
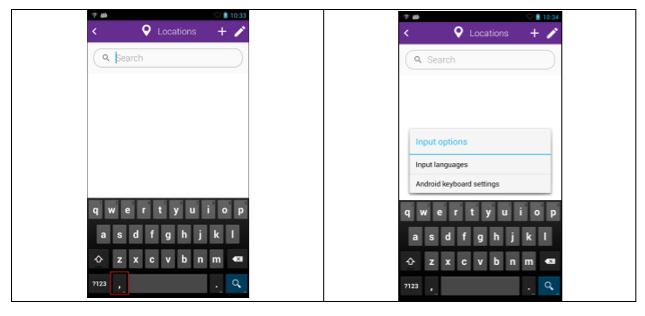
Input Option Details
Because the EnSURE Touch uses a custom version of Android some features do not work or may work differently than other Android devices. The following is how the Input Options work on the EnSURE Touch.
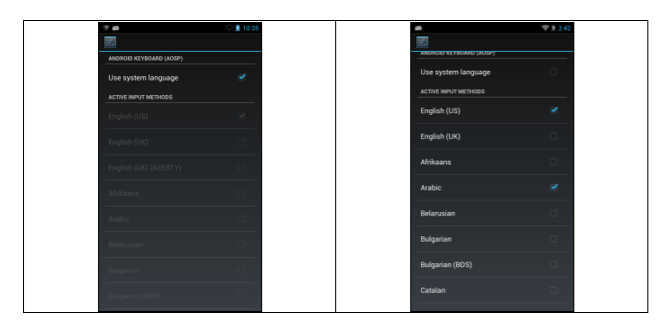
Input Languages
By default, the Input Language matches the System (display) language. However, unchecking Use system language allows the user to select one or more input languages (Keyboards).
Switching Between Keyboards
If another keyboard is selected it will be used by default. However, you can also select multiple keyboards. Switching the keyboards can be done through the keyboard. You can also use the list of keyboards by pressing and holding the space bar and selecting the Keyboard desired.
Android Keyboard Settings
From the Input Options menu, you can select the Android keyboard options. This gives the user access to keyboard settings. Some of the settings will work on the EnSURE Touch, but others will not. Since the EnSURE Touch does not have a mic the voice commands do not work. Sound and vibration feedback do not work. Also, gesture typing does not work. The remaining options are self-explanatory. In the Advanced Setting, there is Custom Input Styles that allow for changes to the keyboard layout defined below.
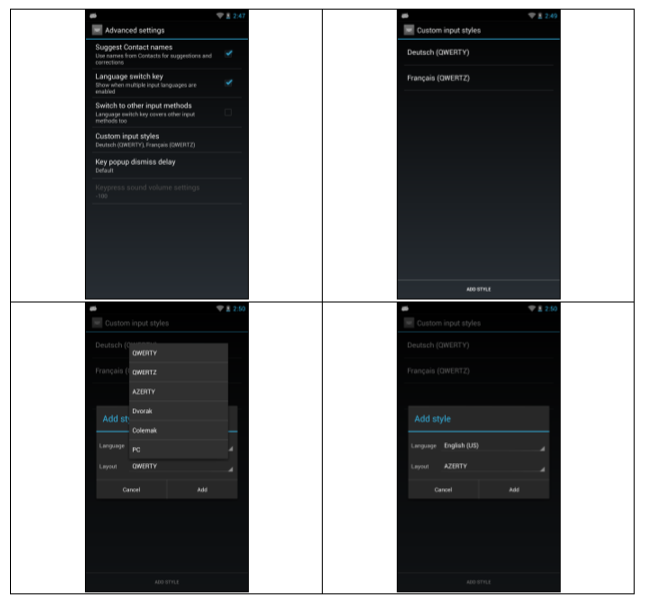
Advanced Settings
In Advanced Settings, the user can select Custom input styles. This can be useful for user that have a special keyboard they prefer. The most common keyboard style is the QWERTZ, but some users like the AZERTY style. To change the style perform the following. In the Advanced settings select Custom input styles. Select the ADD STYLE at the bottom of the screen. Select the Language and Layout. You will be prompted to Enable styles the first time it is selected.
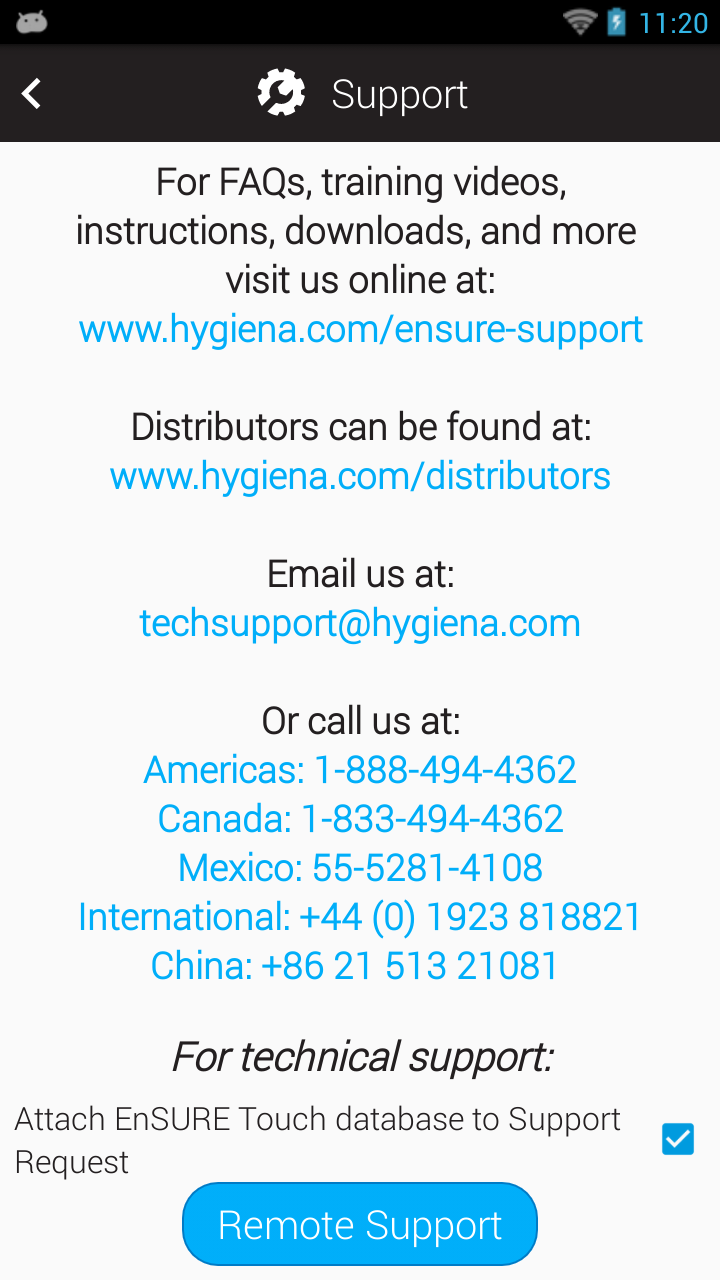
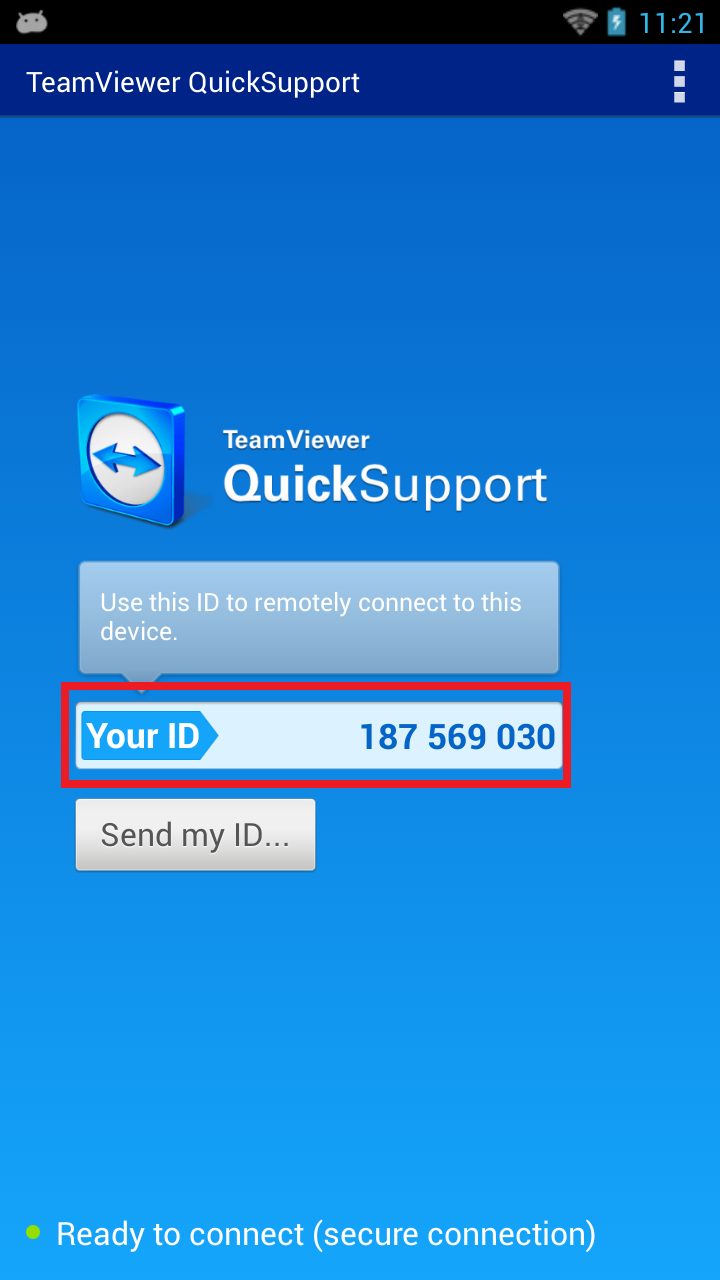
Contact Hygiena Technical Support for further assistance.