Introduction
This document will cover the step by step instructions for configuring USB Tethering on the EnSURE™ Touch. It will also cover the requirements and troubleshooting steps.
Overview
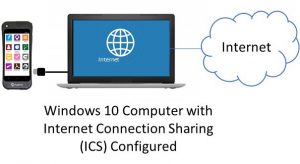
EnSURE Touch needs an internet connection to communicate with SureTrend Cloud. Most customers will use the Wi-Fi features of EnSURE Touch. In some cases, Wi-Fi is not available or acceptable. EnSURE Touch can be connected to a Windows 10 computer using the USB cable that comes with EnSURE Touch and share the internet connection of the Windows 10 computer.
Requirements
- Windows 10 computer with an internet connection and an EnSURE Touch.
- Permissions to install Windows 10 RNDIS6 driver.
- Permissions to configure Windows Internet Connection Sharing (ICS).
- USB-C Cable that comes with the EnSURE Touch.
- Windows 10 knowledge and ability to navigate to Device Manager and Windows Network Connections.
Limitations
- Only one EnSURE Touch can be connected at a time. You can configure multiple instruments on one computer, but only one can be connected at a time.
- Once configured, disconnecting the EnSURE Touch will remove the network adapter from Windows 10. Reconnecting the EnSURE Touch to the Windows 10 computer will reestablish the network adapter and ICS setting, but there is a short delay. The delay is about 30 seconds depending on the computer. Attempting to Sync or perform any network functions during this delay will result in failure. The failure can be dismissed.
- USB Tethering has not been tested on every Windows 10 computer. Success is dependent on the Windows 10 computer ability to support the network adapter driver and ICS configuration.
- Windows 10 computer BIOS, drivers, and Windows updates may be required.
- 3rd party software firewalls may block ICS.
- TeamViewer support on EnSURE Touch does not work with USB Tethering
Configuration Steps
The following are the steps to enable USB Tethering. Each EnSURE Touch has a unique serial number that is bound to the Windows RNDIS driver. This means the Windows steps below must be done for each EnSURE Touch that will be connected to this computer. Once the configuration is complete, disconnecting and reconnecting the EnSURE Touch will reestablish the network adapter ICS settings. This typically takes less than 30 seconds.
Summary of Steps
- Enable USB Tethering on EnSURE Touch.
- Install the Windows 10 RNDIS6 driver.
- Configure Windows Internet Connection Sharing (ICS).
- Verify the connection on the EnSURE Touch.
Enable USB Tethering on EnSURE Touch
- Connect the EnSURE Touch to your PC using the USB cable. This can power the EnSURE Touch while connecting it to the internet.
- Turn on EnSURE Touch. If it is in sleep mode wake it up by pressing the power button once.
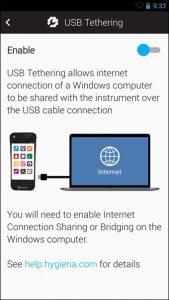
- Navigate to Settings > General > USB Tethering.
- Tap the toggle to enable USB Tethering.
Install the Windows 10 RNDIS Driver
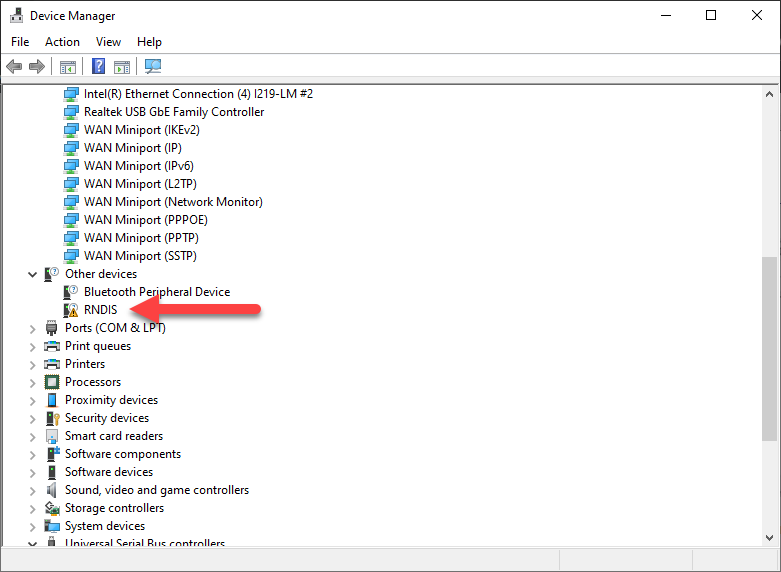
Once the EnSURE Touch is powered on and USB Tethering is enabled, the EnSURE Touch should create an entry in Windows Device Manager as an unknown RNDIS device. You will need Windows 10 permissions to accomplish the following steps.
- Right click the Start button and select Device Manager.
- Expand Other Devices and right click RNDIS.
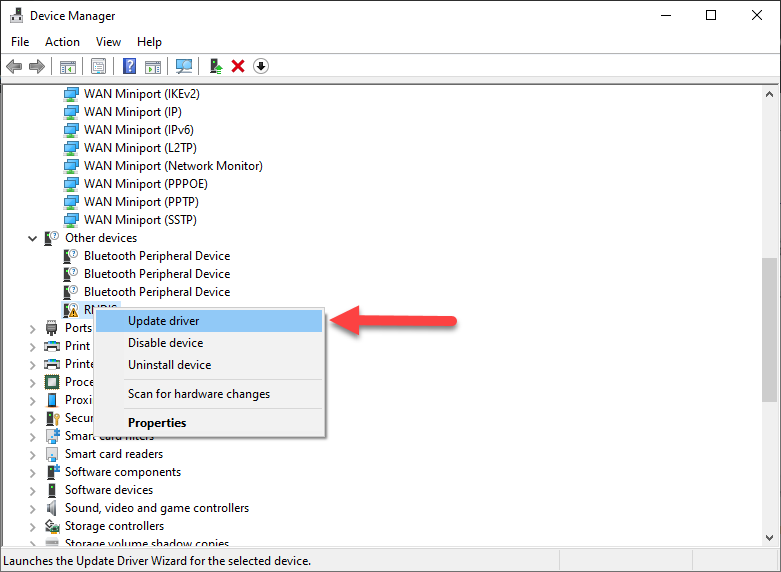
- Select Update Driver.
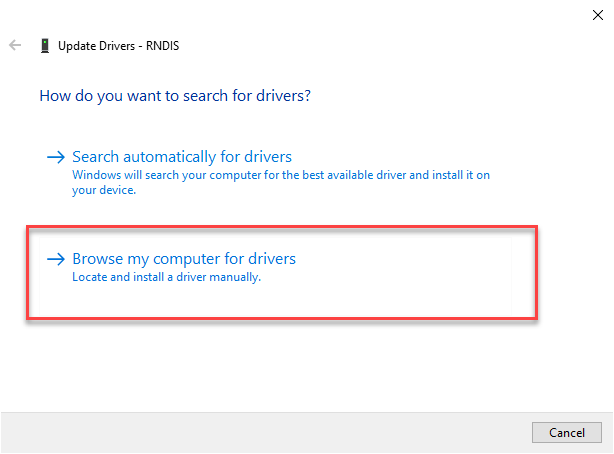
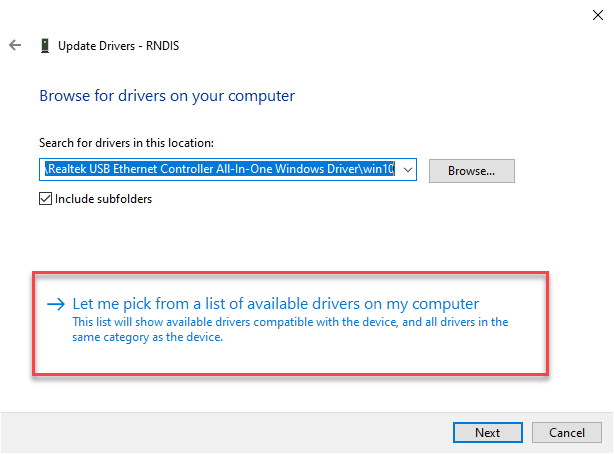
- Select Browse my computer for drivers.
NOTE: Selecting Search automatically for drivers will fail to install the driver correctly. Do NOT select Search automatically for drivers.
- Select Let me pick from a list of available drivers on my computer.
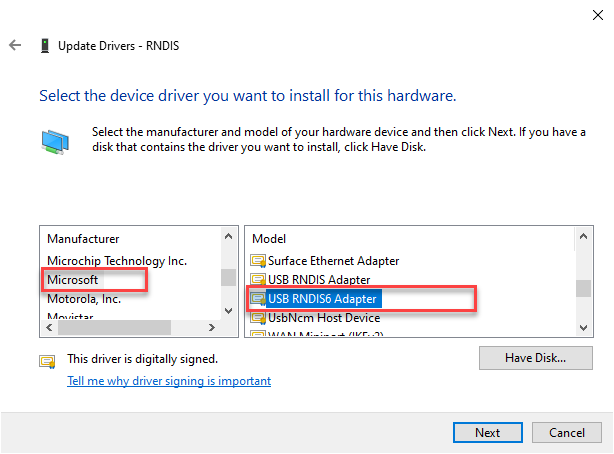
- If necessary, select Network adapters from the list of common hardware types and press the Next button.
- Allow time for Device Manager to populate a list of manufacturers and models. Select Microsoft from the list of manufacturers and USB RNDIS6 Adapter from models.
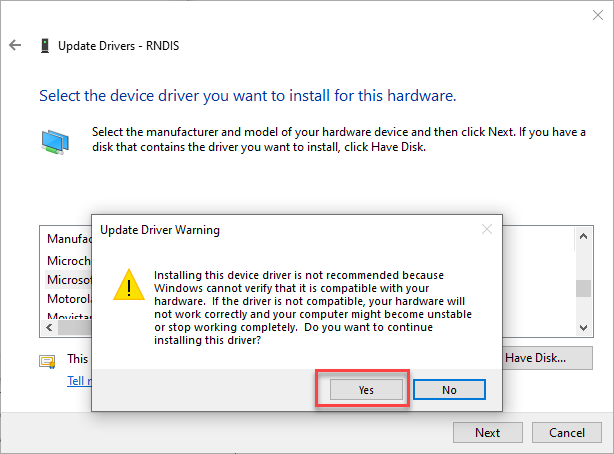
- Click Yes on the Update Driver Warning dialog box.
- The following message box will appear when the driver is successfully installed.
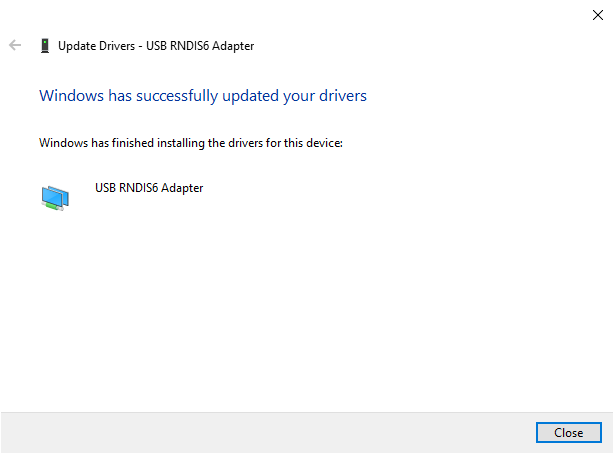
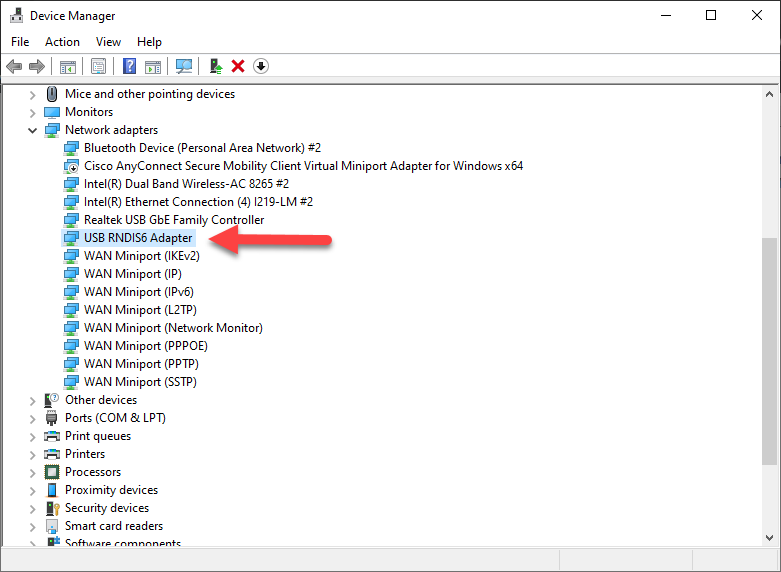
- If the driver was installed correctly, it will display in Device Manager as USB RNDIS6 Adapter.
Configure Internet Connection Sharing (ICS)
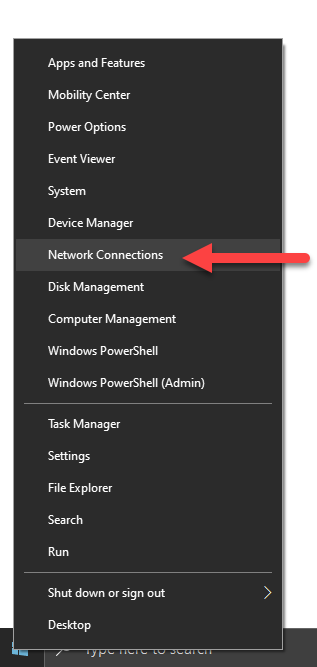
- Right click the Start button and select Network Connections.
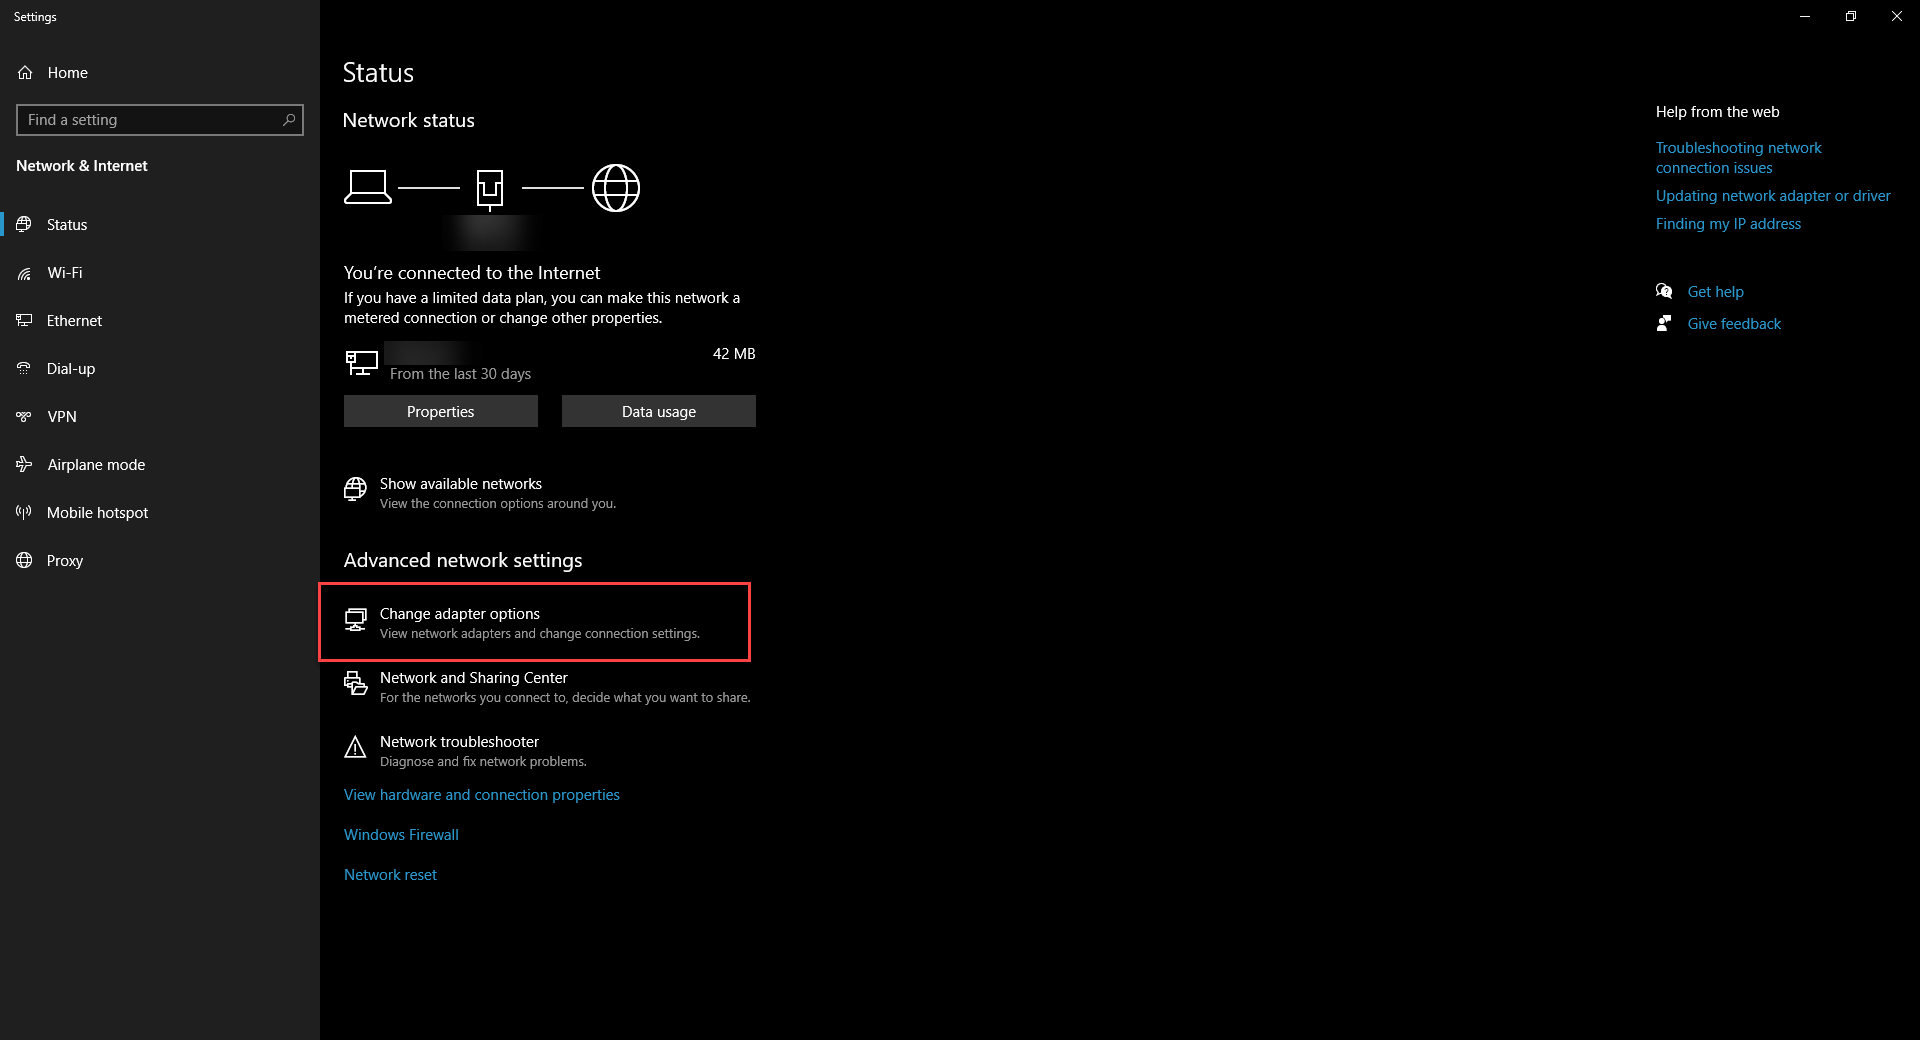
- Click Change Adapter Options.
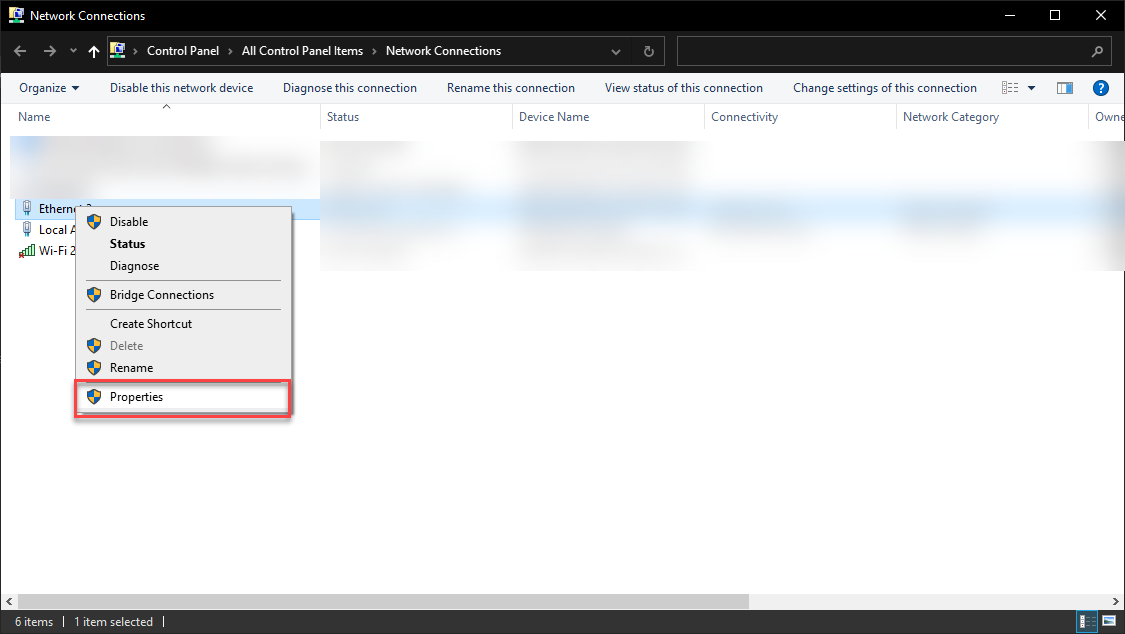
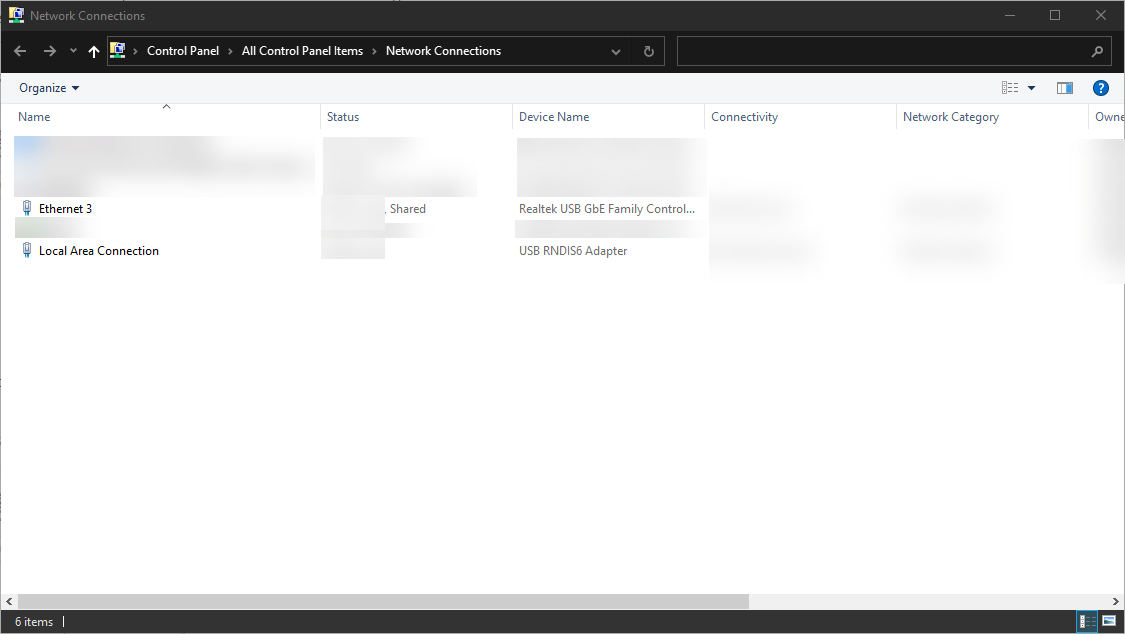
- Locate the network connection that is used for internet access. This will likely have your domain name in the Status field.
- Right click the network connection and select Properties.
- Click the Sharing tab and check the checkbox for Internet Connection Sharing.
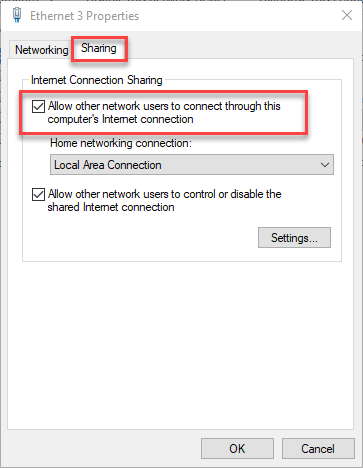
- If done correctly, the two networks should have ICS enabled and the shared network should show Shared in the status.
Restart EnSURE Touch
- Press and hold the power button until the power menu appears.
- Select Restart from the menu.
- Go to Settings > General > USB Tethering.
- When the USB Tethering screen in enabled and has obtained an IP address it will have a Check Connection button. Tap the Check Connection button.
- If PC Connection and SureTrend Connection show a “Pass” result, then USB Tethering has been successfully configured.
Troubleshooting
The following are some known conditions and how to resolve them.
RNDIS Driver Does Not Appear in Device Manager
If the EnSURE Touch shows in device manager as Unknown USB Device that typically means the cable is not communicating with the Windows 10 computer or USB Tethering has not been enabled.
Solution
- Repeat the steps in the section titled “Enable USB Tethering on EnSURE Touch.”
- Replace the USB-C cable.
- The steps above did not resolve the issue, there may be a hardware issue with the USB port on the instrument. Contact Hygiena Technical Support for further assistance.
Prevent the Network Adapter from Going to Sleep.
The network adapter may enter sleep mode when the PC is not in use.
Solution
- Right click the Start button and select Control Panel.
- Select Network and Internet.

- Select Network and Sharing Center.
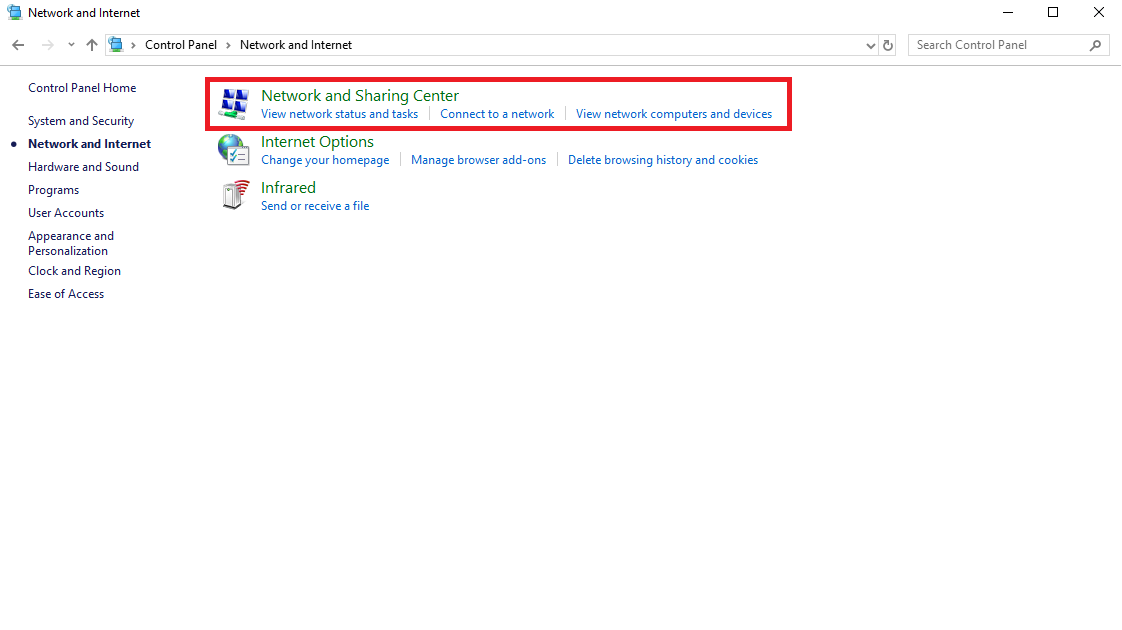
- Select Change Adapter Settings.
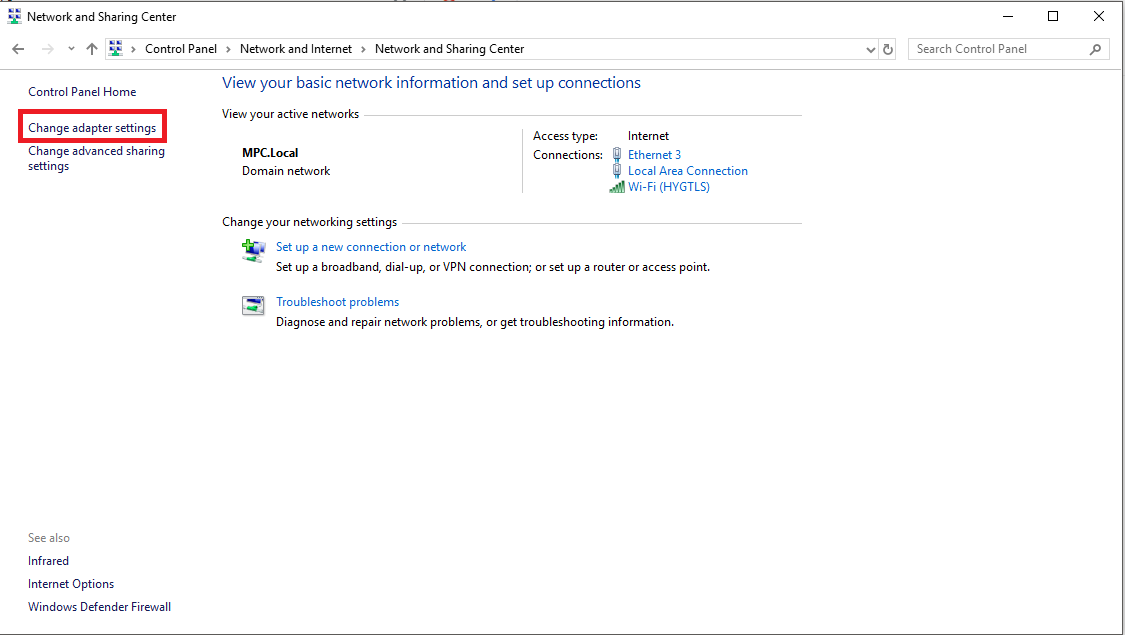
- Select your Shared Network Connection, and select Properties.

- Select Configure.

- Check the checkbox for Allow this device to wake the computer.

- Click OK.
Wi-Fi Does Not Work After Using USB Tethering
USB Tethering needs to be disabled before attempting to use Wi-Fi. See the steps below to fix this issue.
Solution
- Connect the EnSURE Touch to a PC with a USB-C cable.
- Go to Settings > General > USB Tethering.
- Tap the toggle to enable USB tethering if it was disable.
- Tap the toggle to disable USB tethering.
If you are having trouble with USB Tethering on your EnSURE Touch, please contact Hygiena Technical Support for assistance.


