Migrating from SureTrend 3 to SureTrend Cloud
Before you Begin
Migrating from SureTrend 3 to SureTrend 4
- Close SureTrend 3.
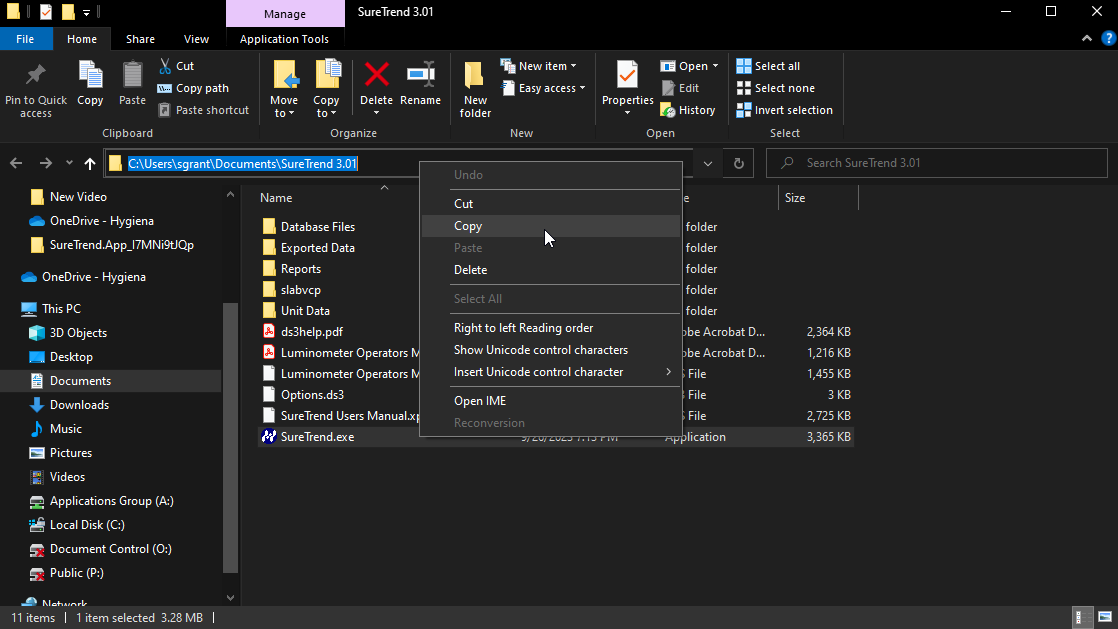
- Right click your SureTrend 3 desktop icon and select Open file location.
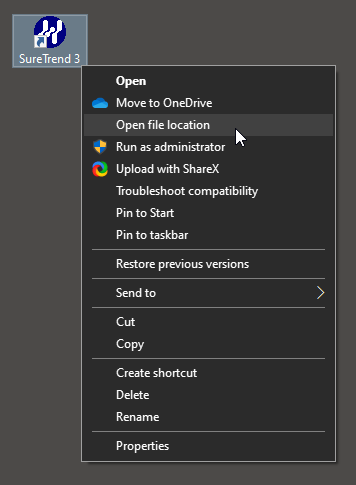
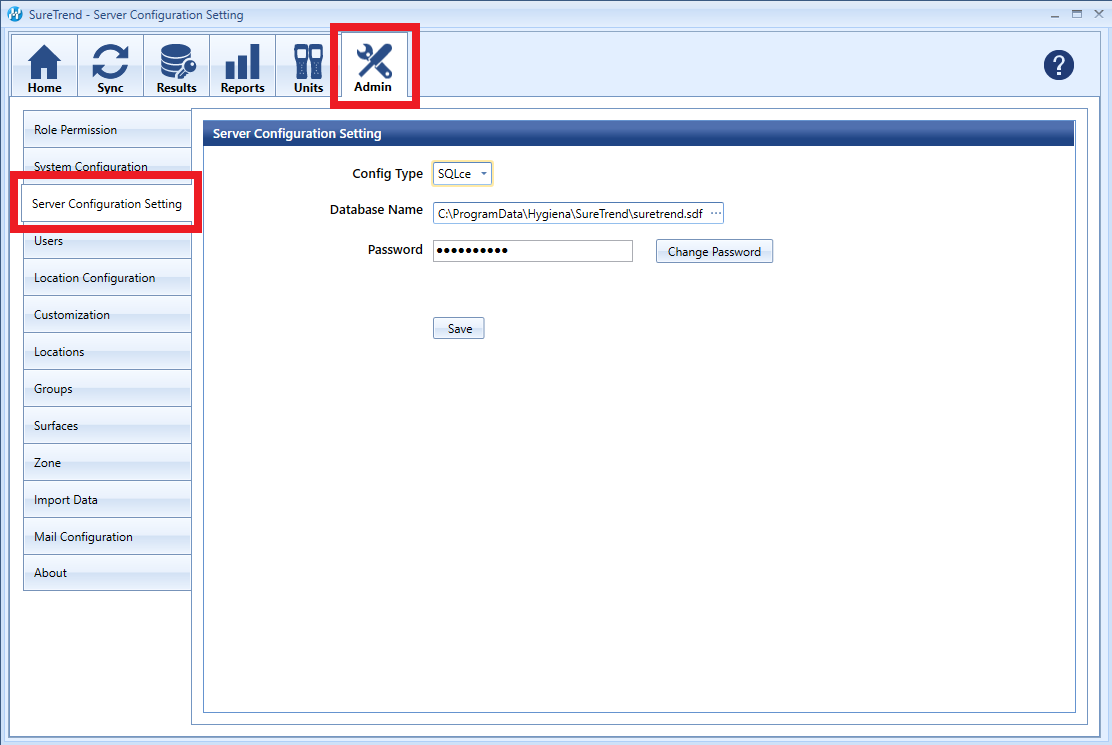
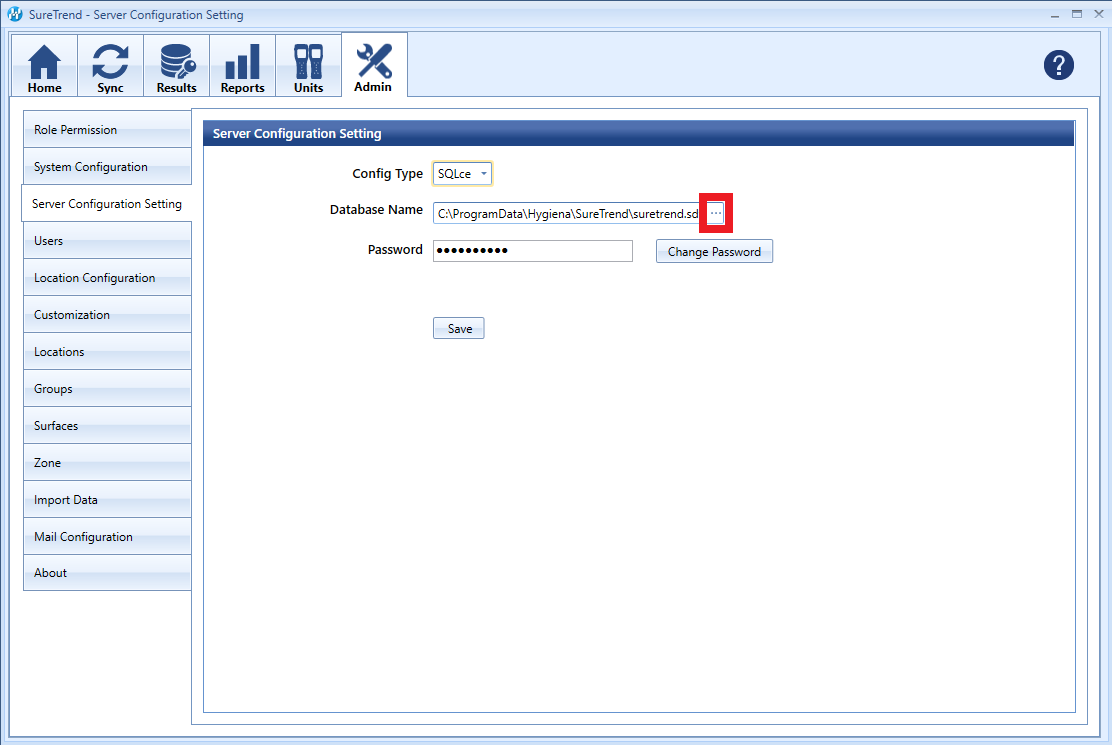
- Copy the file path from the address bar.
- Open SureTrend 4.
- Click Admin.
- Click Import Data.
- Select SureTrend 3.01 or Prior from the Source dropdown menu.
- Paste the file path in the Location
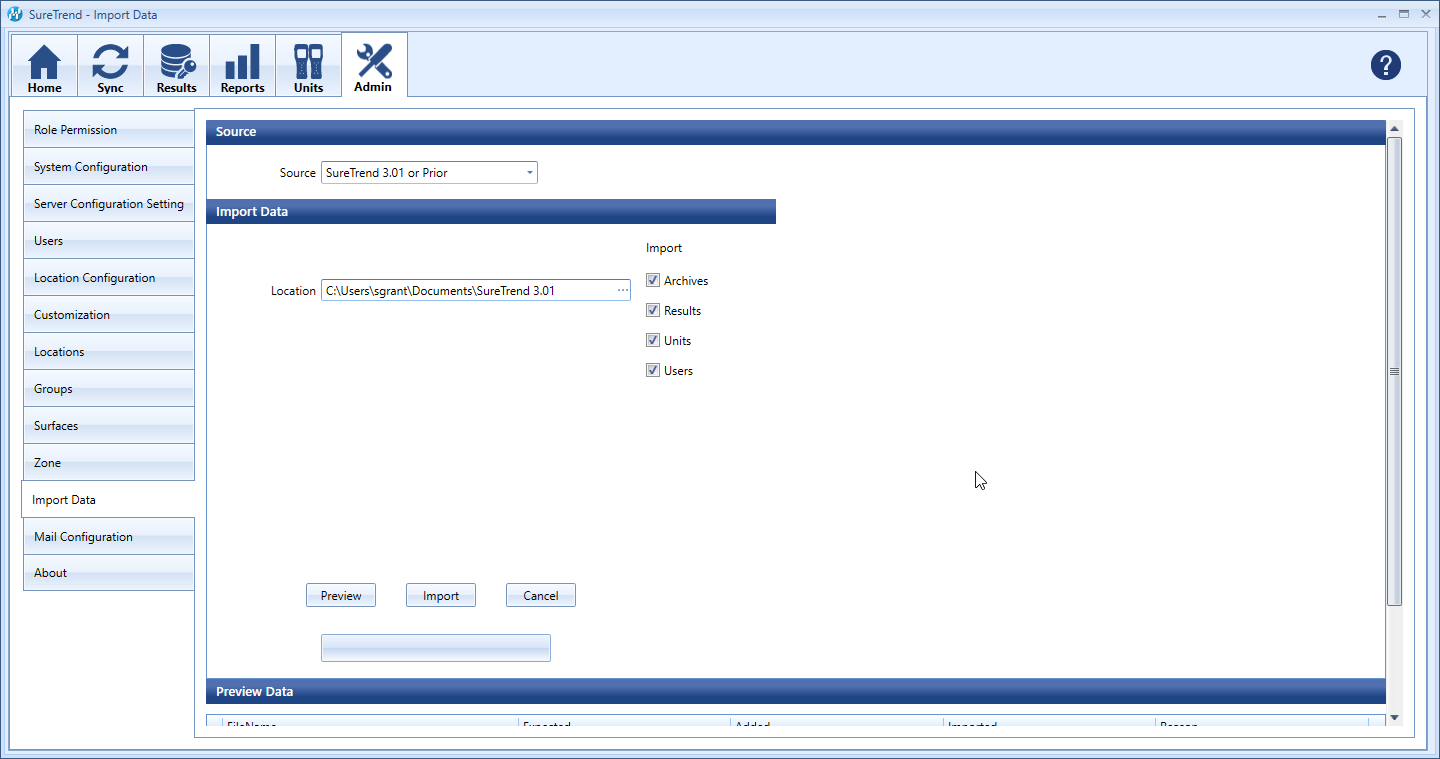
- Click Import and wait for the process to complete.
- Click the Results tab to confirm the data was imported.
If data was not imported, then your database files may be stored outside of the root folder. See the following instructions:
- Open SureTrend 3.
- Click Set-up and select Preferences.
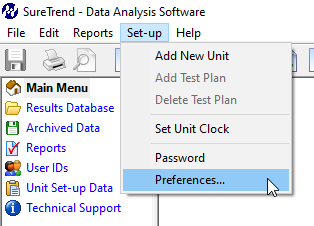
- Copy the file path from the SureTrend Data File Options.

- Close SureTrend 3.
- Open SureTrend 4.
- Click Admin.
- Click Import Data.
- Select SureTrend 3.01 or Prior from the Source dropdown menu.
- Paste the file path in the Location.

- Click Import and wait for the process to complete.
- Click the Results tab to confirm the data was imported.
Migrating from SureTrend 4 to SureTrend Cloud
- Create a SureTrend Cloud account if you do not have one.
- Log into SureTrend Cloud.
- Click Migrate from SureTrend 4.
- If you have more than one site, select the site to migrate the data to from the Sites dropdown menu.
- If you changed the SureTrend 4 database password, click expand the password menu and enter the database password. Otherwise, leave this field blank.
- Click Choose File.
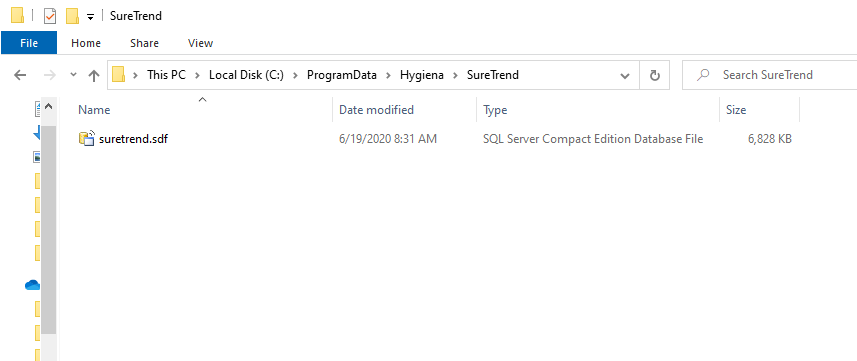
- Navigate to C:\ProgramData\Hygiena\SureTrend\ or your database file location
- Select the suretrend.sdf file and click Open.
- Expand the PIN menu and enter a 4-digit PIN to set the default PIN for users.
- Click Upload File.
- Wait for the upload to complete. You should be able to see your data in the Results tab within 15 minutes.
Contact Hygiena Technical Support for further assistance.
- Phone: 1-888-HYGIENA (1-888-494-4362, option 2)
- Email: techsupport@hygiena.com
- Submit a Support Ticket
- Schedule a Microsoft Teams meeting with support