Results
Results in SureTrend Cloud
The Results tab of SureTrend Cloud allows you to view your testing data similar to how you would on an Excel spreadsheet.
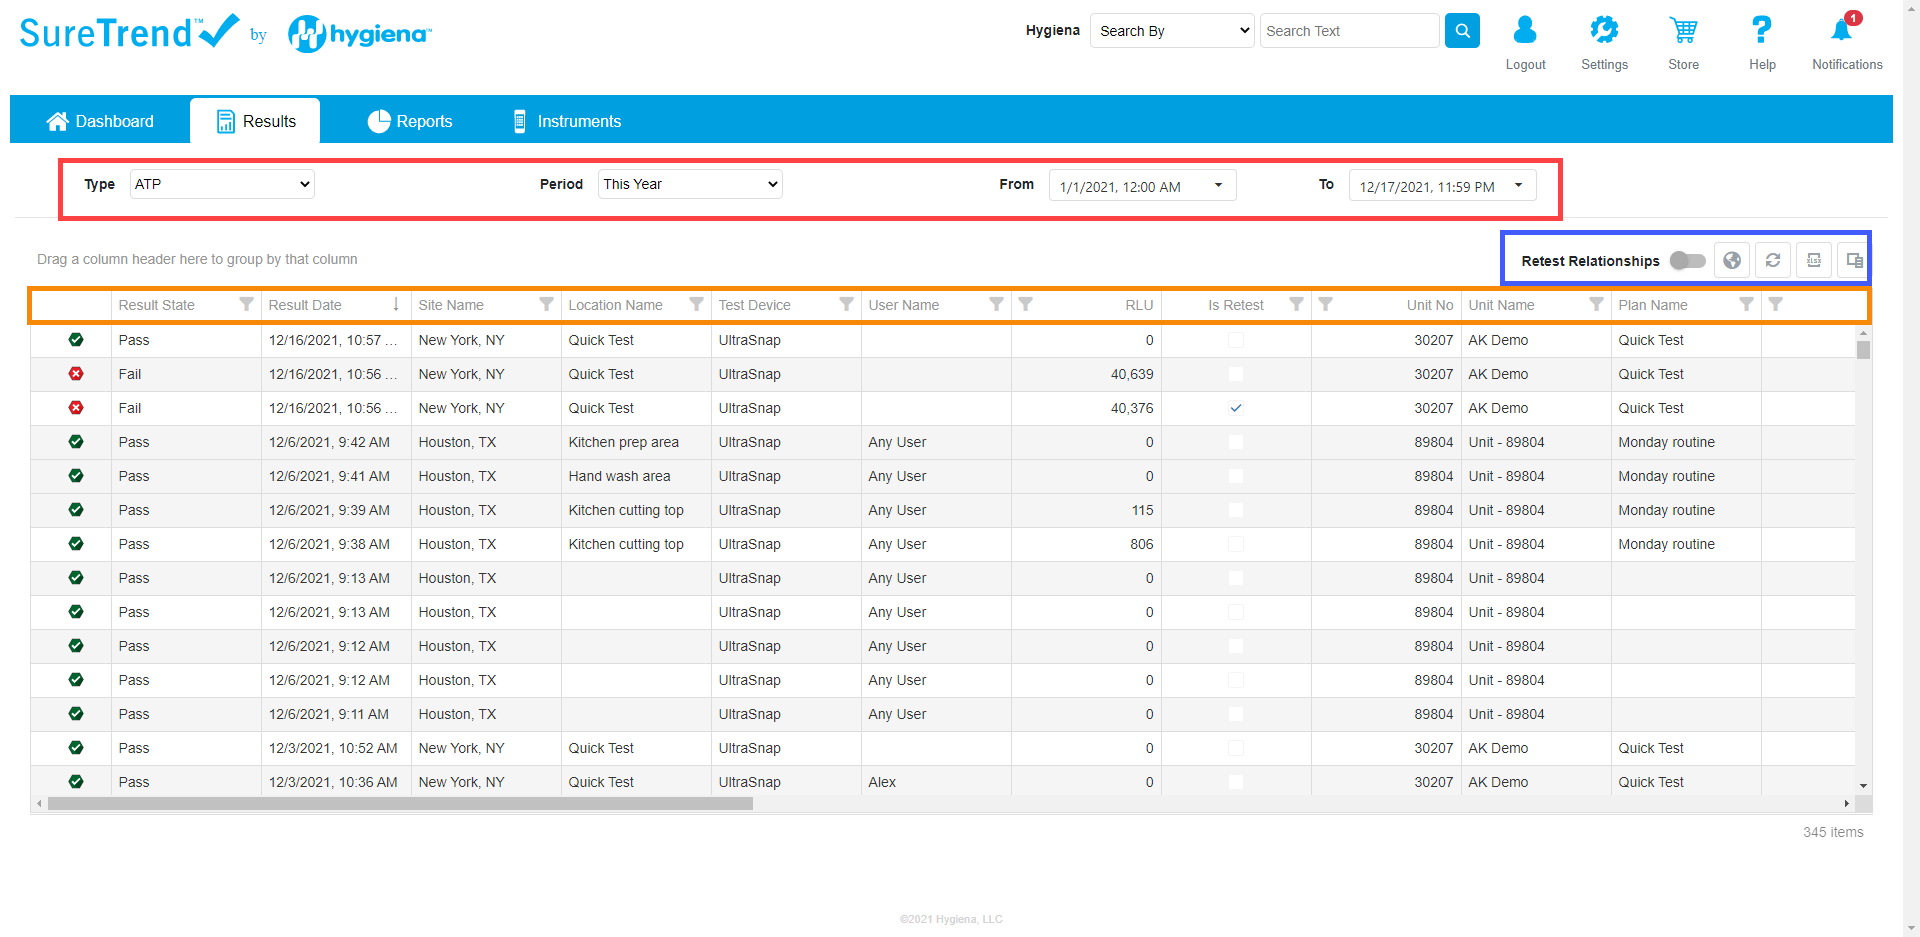
Red Box: These are your main filters. Type allows you to choose the type of results you’d like to see (e.g. ATP, Microorganisms). Period, From & To allow you to select date ranges like you can on the reports.
Orange Box: These columns can be sorted A-Z / Z-A by clicking on them. You can also click the funnel icon to filter. You can customize the order of the columns by dragging and dropping them. You can also add in new columns but clicking the column chooser button which is on the far right of the blue box.
Blue Box: The buttons in the blue box in order are as follows:

The World button allows you to upload a floor plan of your facilities and display your results on the floor plan. The following section covers this feature in detail.
This is the reset button. If you make changes to your results page such as adding filters, you can press this button to reset all changes.
This is your export button. You can export your data to your computer for analysis using Excel.
This is your column chooser button. When you open it you will be able to drag columns in and out of your view.
Instruments Tab
This page shows the instruments registered to your SureTrend Cloud account. Each instrument is assigned to a site (facility). You can edit the instrument name and the site it is assigned to by clicking the pencil icon. If you change the site, you will see a pop-up message alerting you that this would modify the programing information on the instrument. This is because programming information is tied to the site, not the instrument. By default, instruments on the same site share the same programming information.
![]()