

Site Management
SureTrend Cloud allows users to separate data and users by sites. A site generally represents a facility or plant. You can create additional sites to control which plans and locations are available to users or instruments. This article will illustrate how to create new sites, permit site access to users, and register instruments to a specific site.
Creating a New Site
- Log into SureTrend Cloud.
- Click the Sites tab.
- If necessary, click the name of your site to collapse the expanded site menu.
- Click the + button to add a new site.
- Enter a name for your site click the Save button.
To deactivate a site, please see these instructions.
Users
SureTrend Cloud has four different roles for users: SureTrend User, Admin, Global Admin, and Owner. Owners and Global Admins have access to all sites in the account. Admins and SureTrend Users only have access to sites that are assigned to them through user management. Admins have full access to their assigned sites. SureTrend Users are only permitted to view results, run reports, and register new instruments for their assigned sites.
Creating a New User for a Site
Note: A new user can only be added the account if the email for the user is not registered with another account. Once the steps below are completed, the user will receive an email with instructions to reset their password.
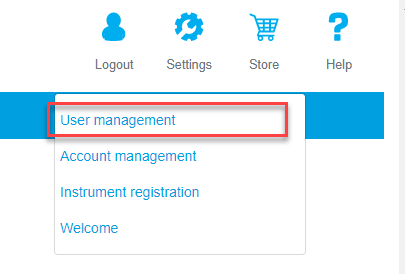
- Click Settings and select User Management.
- Click the + button to add a new user.
- Enter the user’s information.
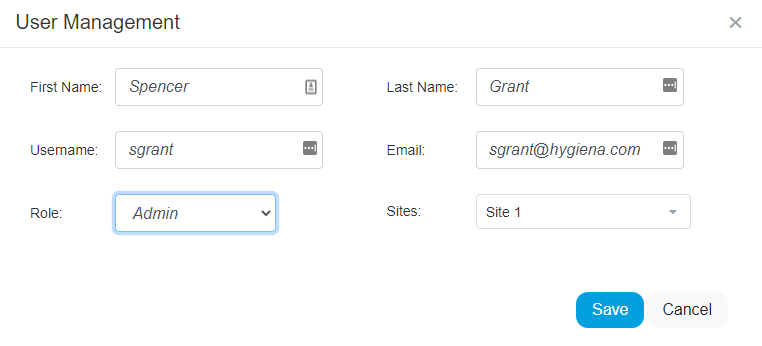
- Select a Role for the user from the dropdown menu.
- Select a Site for the user from the dropdown menu.
- Click Save.
Enable Site Access for SureTrend Cloud Users
Note: A user with the role of Global Admin or Owner has access to all sites. Enabling site access for Admins and SureTrend Users will allow them to view results for their sites, modify locations and plans, and manage instruments registered to their site.
- Click Settings and select User Management.
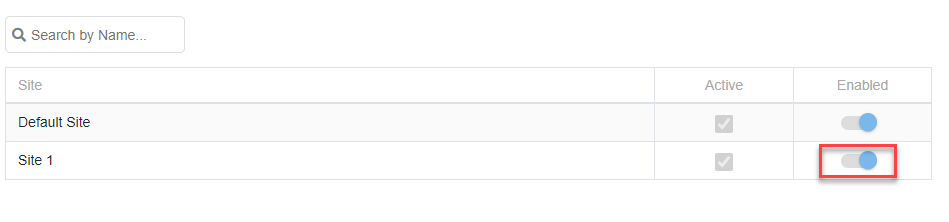
- Click on the user that you want to grant site access.
- Click the toggle for each site you want to enable or disable.
Instruments, Plans, and Locations
Plans and locations are created at the site level. Any plan or location that is created without the global attribute enabled is only available to instruments that are registered the site where those plans and locations are created. At least one instrument needs to be registered to a site in order to manage the plans and locations for that site.
Registering an EnSURE Touch to a Site
Note: You must create at least one additional site before you can register an instrument to another site. You must also be connected to Wi-Fi on your EnSURE Touch in order to complete the registration.
- Click the Home tab.
- Click the Register Instrument button.
- Enter a name for your instrument and select a site from the Site dropdown menu.
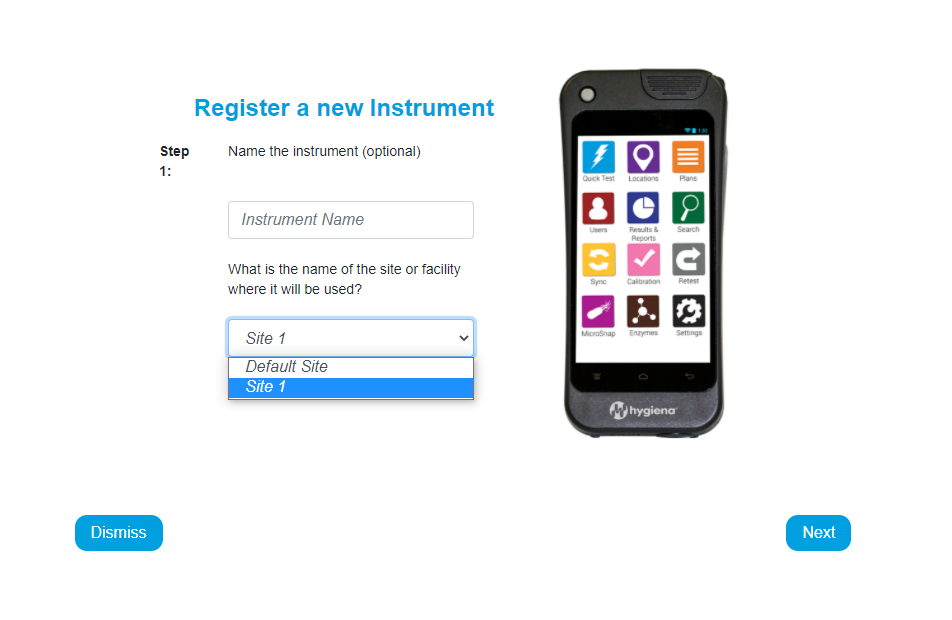
- Click Next.
- On the EnSURE Touch, open the sync app.
- Enter the username and code from the Cloud into the sync app on the instrument.
Changing Site Registration for a Registered EnSURE Touch
Note: Changing the site registration for an EnSURE Touch will result in data loss for any results stored on the instrument before changing the registration. Sync your instrument before proceeding with these steps. Any results recorded with the instrument will not be retroactively updated to reflect the site changes. Only future results will be associated with the site after the change.
- Click Settings and select Instrument Management.
- Click the Edit button for the instrument that you want to move to another site.
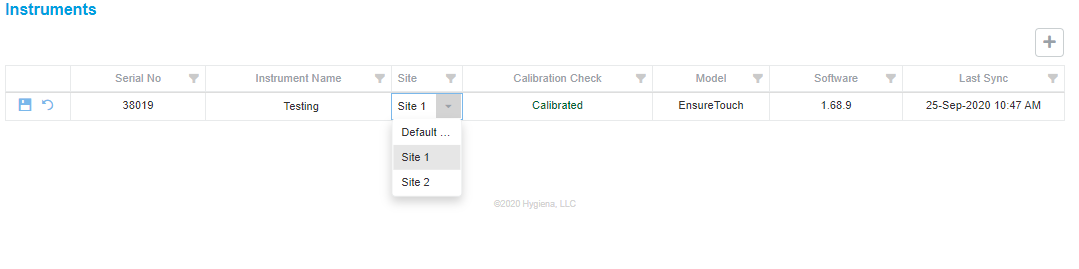
- Click the Site field and select the new site from the dropdown menu.
- Click the Save button.
Managing Plans and Locations for a Site
- Click the Sites tab.
- If necessary, click the name of the current site to collapse the expanded site menu.
- Click the name of your site from the site list.
- You can make modifications to the plans and locations for the site there. For more detail instructions on how to create plans and locations, please refer to this SureTrend Cloud Manual.
Contact Hygiena Technical Support for further assistance.
- Phone: 1-888-HYGIENA (1-888-494-4362, option 2)
- Email: techsupport@hygiena.com
- Submit a Support Ticket
- Schedule a Microsoft Teams meeting with support