

There are various ways to install and configure SureTrend 4 that give users more control and security over their databases. This article will go over the network share installation method and configuration settings. A network share installation is intended for one or more users accessing a database stored on a network drive from one or more computer(s).
Network Share Installation
Install SureTrend 4
- Download the most recent build here.
- After the file is finished downloading, double click the installer to run it.
- Select your preferred language and click Next.
- Read and accept the license agreement, then click Next.
- Leave the checkbox for Multiuser Distributed Network unchecked.
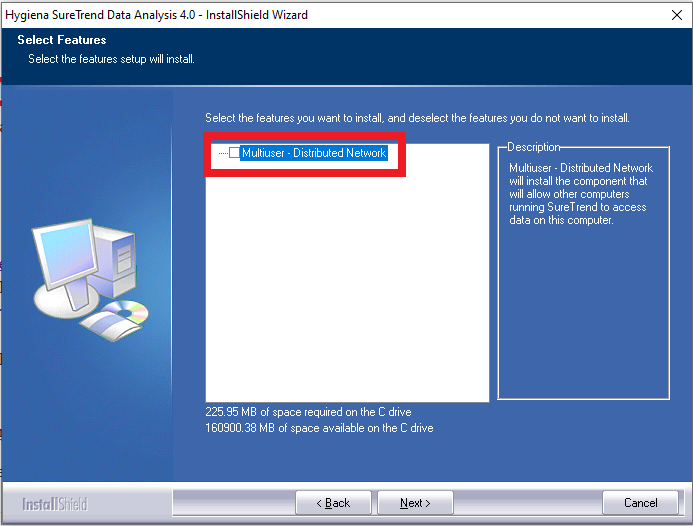
- Click Next.
- Wait for the installation to complete, then click Finish.
Copy the Database File to a Shared Network Drive
- Open File Explorer.
- Navigate to C:\ProgramData\Hygiena\SureTrend\
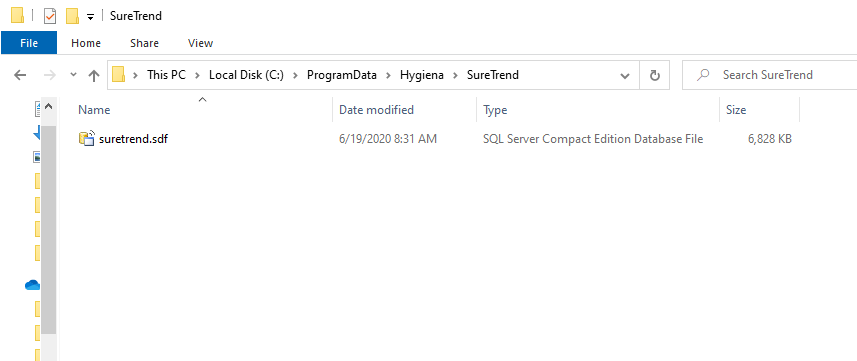
- Copy suretrend.sdf.
- Navigate to the location where you would like to store the database on your shared network drive and paste the database file.
Update the Server Configuration Settings in SureTrend 4
- Launch SureTrend 4.
- Click the Admin tab.
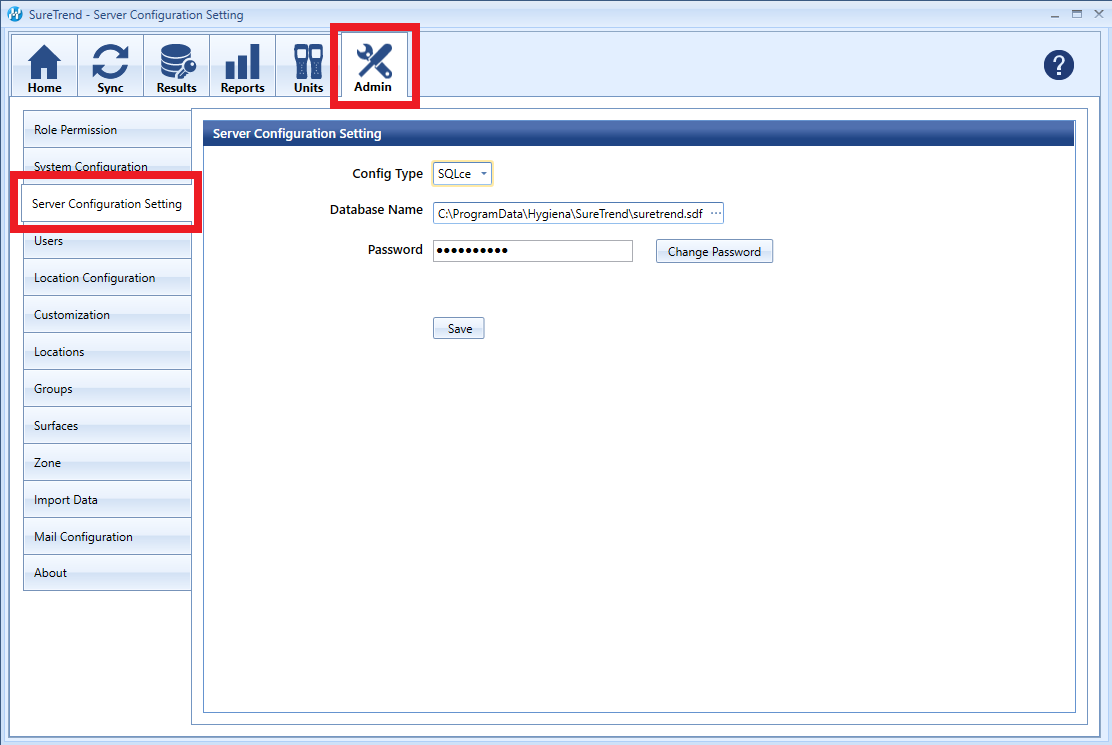
- Click Server Configuration Settings.
- Click on the … button at the end of the Database Name field.
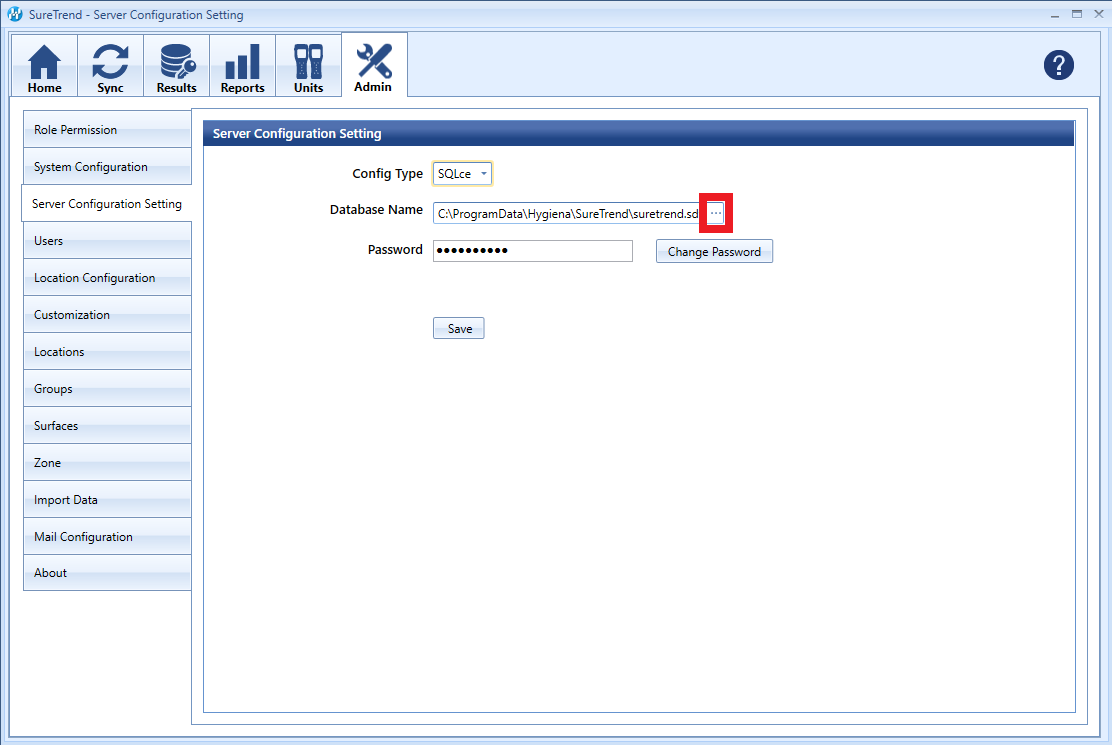
- Navigate to the suretrend.sdf file on the shared network drive and select it.
- Click Open.
- Click Save.
- Click Yes when prompted to save and restart.
Repeat the installation and update the server configuration settings for each computer that a user will access the database from.
User Permissions
Some users may experience problems accessing their database after moving the database to a shared network drive. This is generally due to network security settings or policies prohibiting the user from reading or writing to the database file. See the steps below to assess user permissions.
Verify User Permissions on the Shared Network Drive
- Open the folder where the database is stored on the shared network drive.
- Click the Share tab.
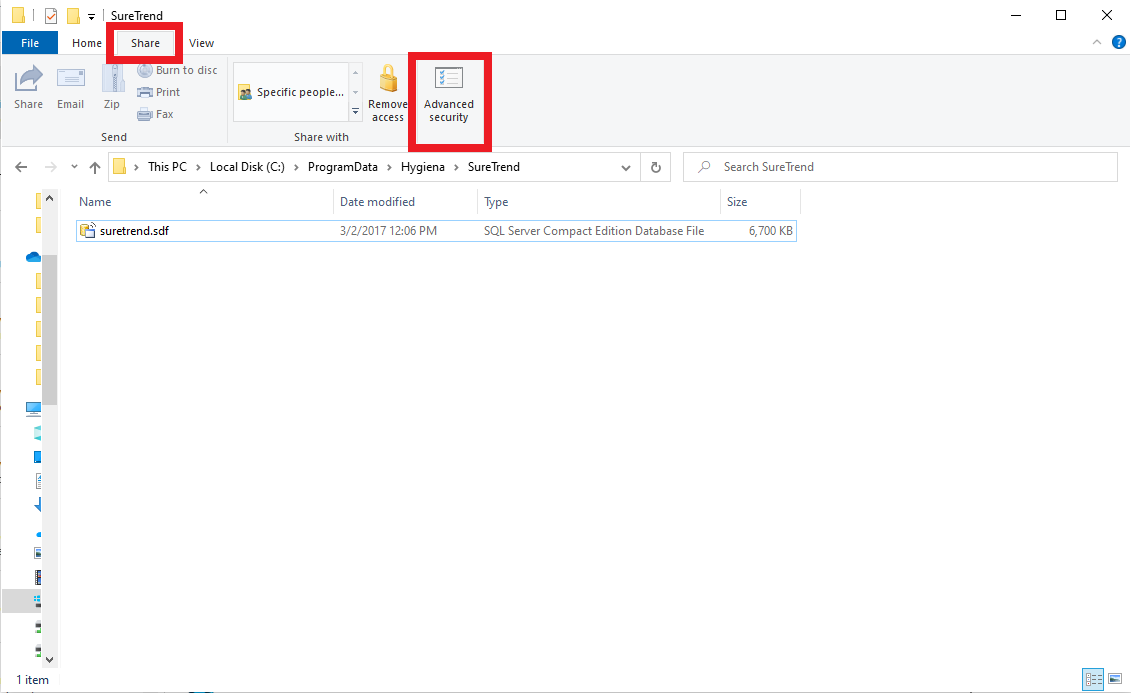
- Click Advanced Security.
- Click the Effective Access tab.
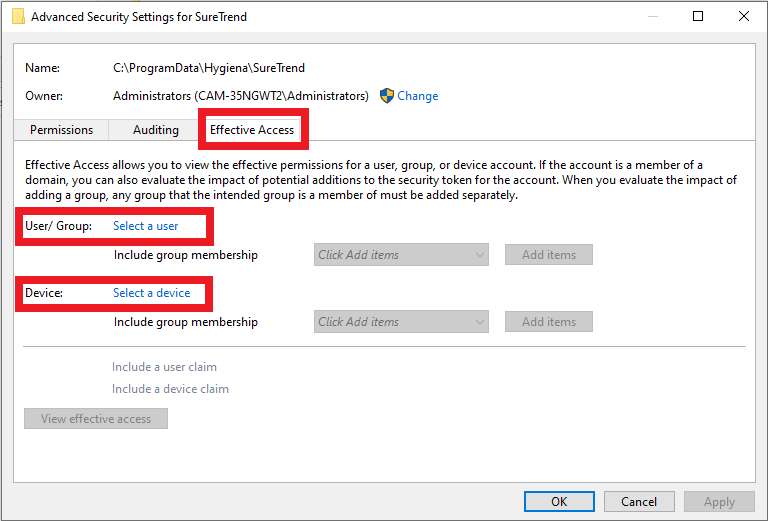
- Click Select a user.
- Enter the username of the Windows user and click Ok.
- Click Select a device.
- Enter the name of your device and click Ok.
- Click View effective access.
- Verify that the appropriate user has full control.
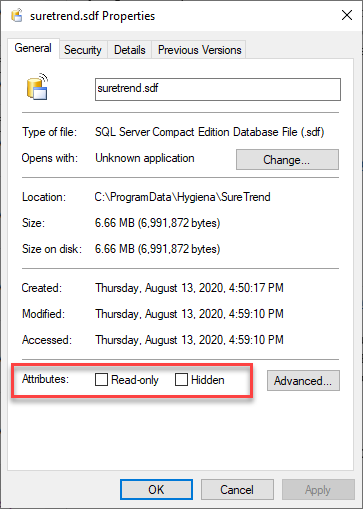
Verify the Database File is Not Marked Read-only
- Open the folder where the database is stored on the shared network drive.
- Right click the database file and select Properties.
- Verify Read-only is unchecked.
Contact Hygiena Technical Support for further assistance.
- Phone: 1-888-HYGIENA (1-888-494-4362, option 2)
- Email: techsupport@hygiena.com
- Submit a Support Ticket
- Schedule a Microsoft Teams meeting with support